📖 本教程更新于 2022 年 08 月 18 日,教程的内容针对最新稳定版而更新(如果你是旧版,教程会有些出入,请留意)

🦋 Butterfly 已经更新到 4.4.0

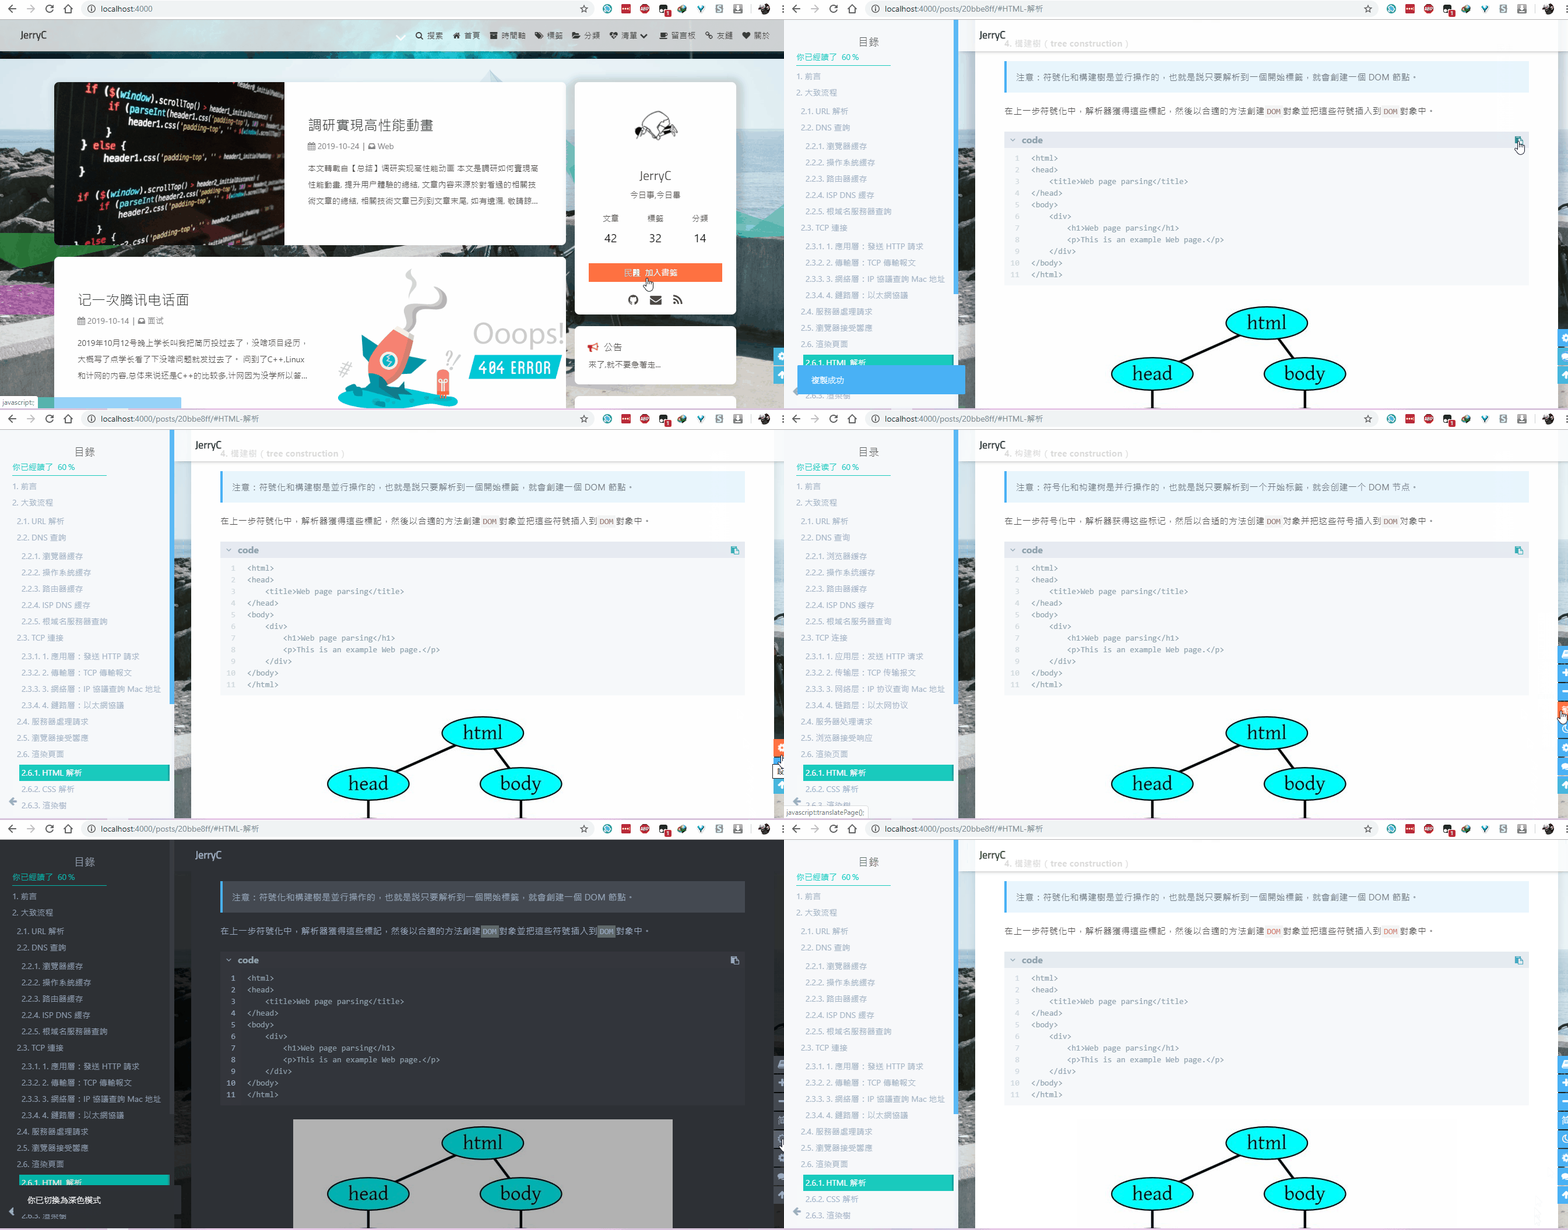
你可以通过右下角的 按钮切换为简体显示


评论

从3.0.0开始,开启评论需要在comments-use中填写你需要的评论。

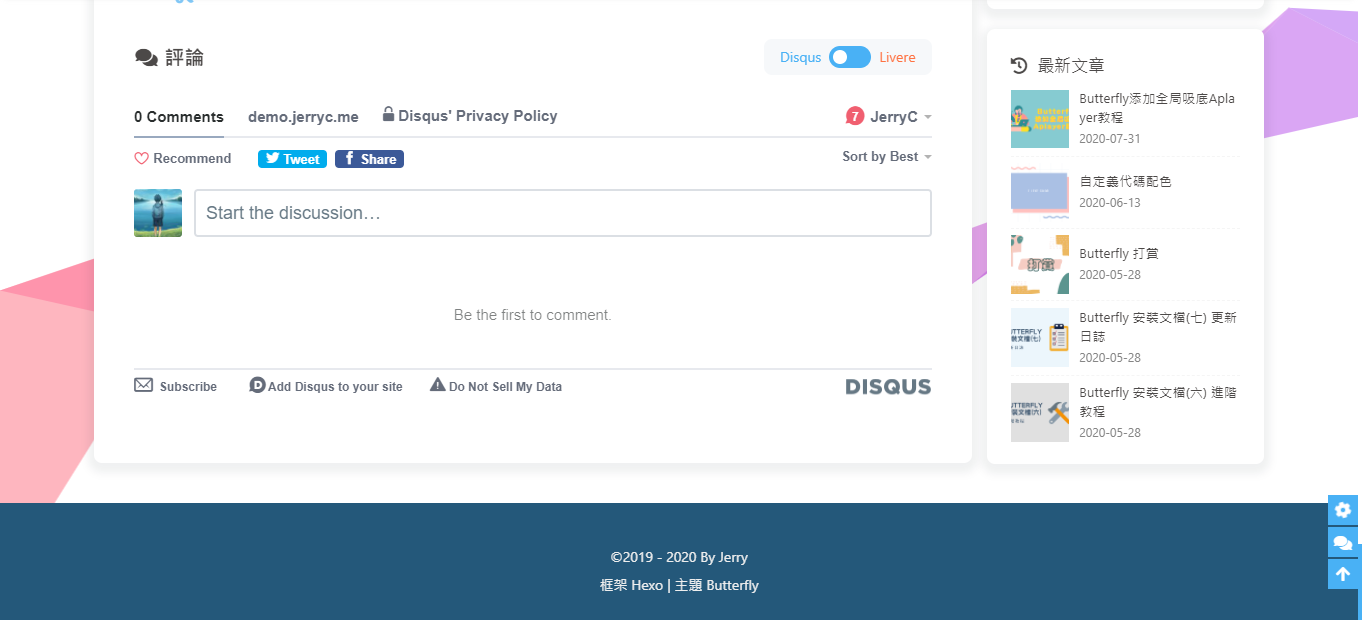
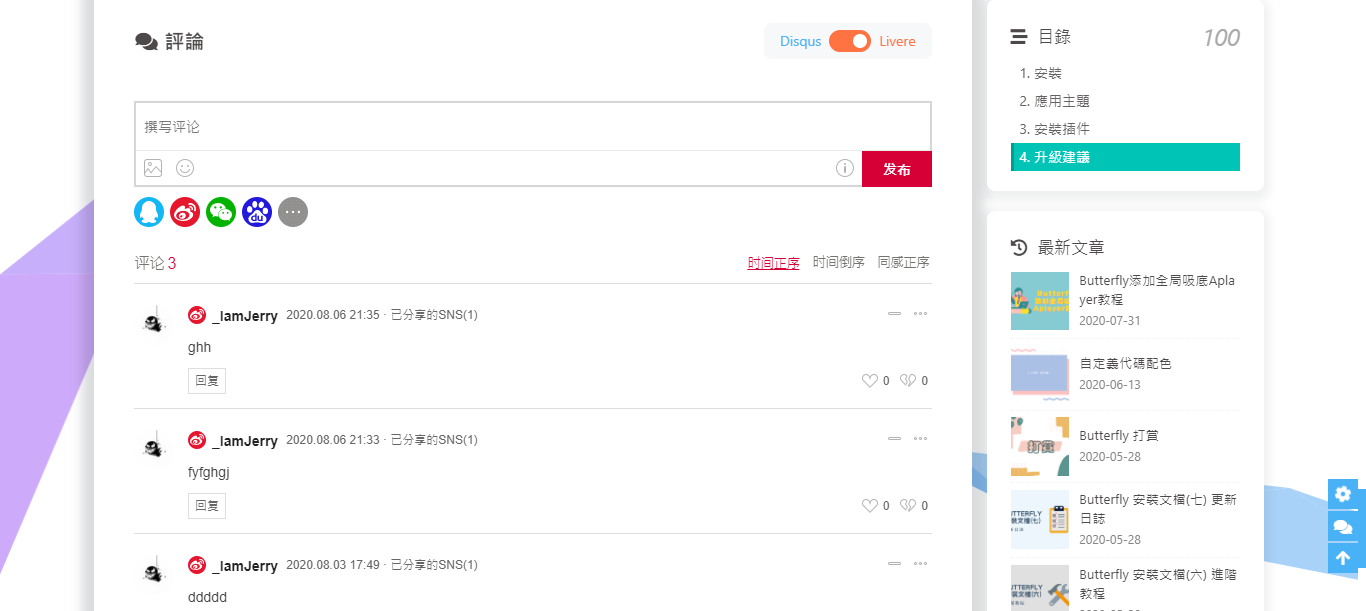
支持双评论显示,只需要配置两个评论(第一个为默认显示)

1
2
3
4
5
6
7
8
9
10
comments:
# Up to two comments system, the first will be shown as default
# Choose: Disqus/Disqusjs/Livere/Gitalk/Valine/Waline/Utterances/Facebook Comments/Twikoo
use: Valine,Disqus
text: true # Display the comment name next to the button
# lazyload: The comment system will be load when comment element enters the browser's viewport.
# If you set it to true, the comment count will be invalid
lazyload: true
count: true # Display comment count in top_img
card_post_count: false # Display comment count in Home Page
参数 解释
use 使用的评论(请注意,最多支持两个,如果不需要请留空)
注意:双评论不能是 Disqus 和 Disqusjs 一起,由于其共用同一个 ID,会出错
text 是否显示评论服务商的名字
lazyload 是否为评论开启lazyload,开启后,只有滚动到评论位置时才会加载评论所需要的资源(开启 lazyload 后,评论数将不显示
count 是否在文章顶部显示评论数
livere、Giscus 和 utterances 不支持评论数显示
card_post_count 是否在首页文章卡片显示评论数
gitalk、livere 、Giscus 和 utterances 不支持评论数显示

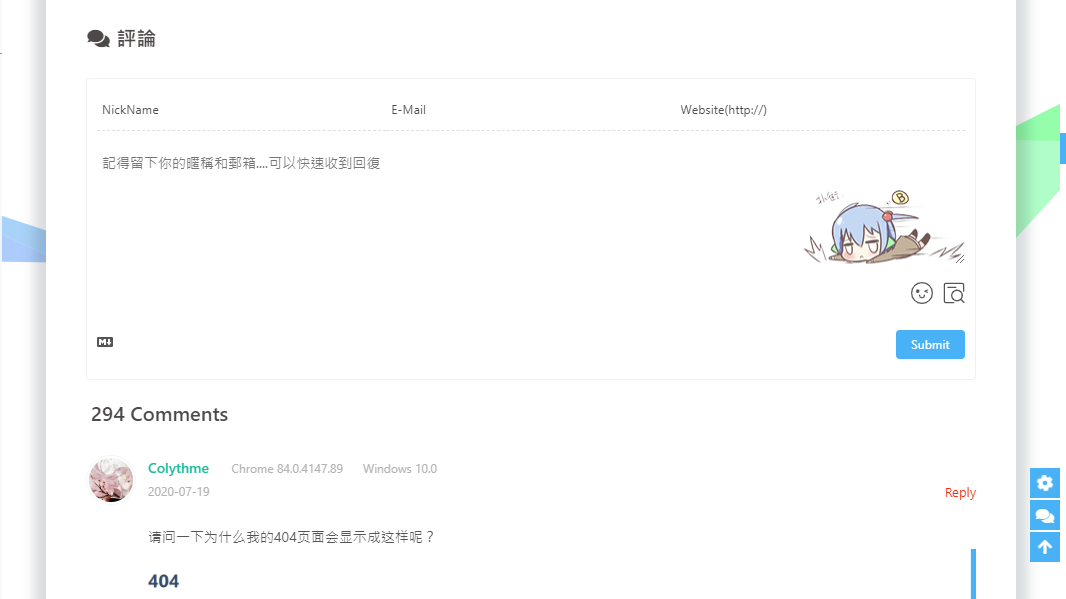
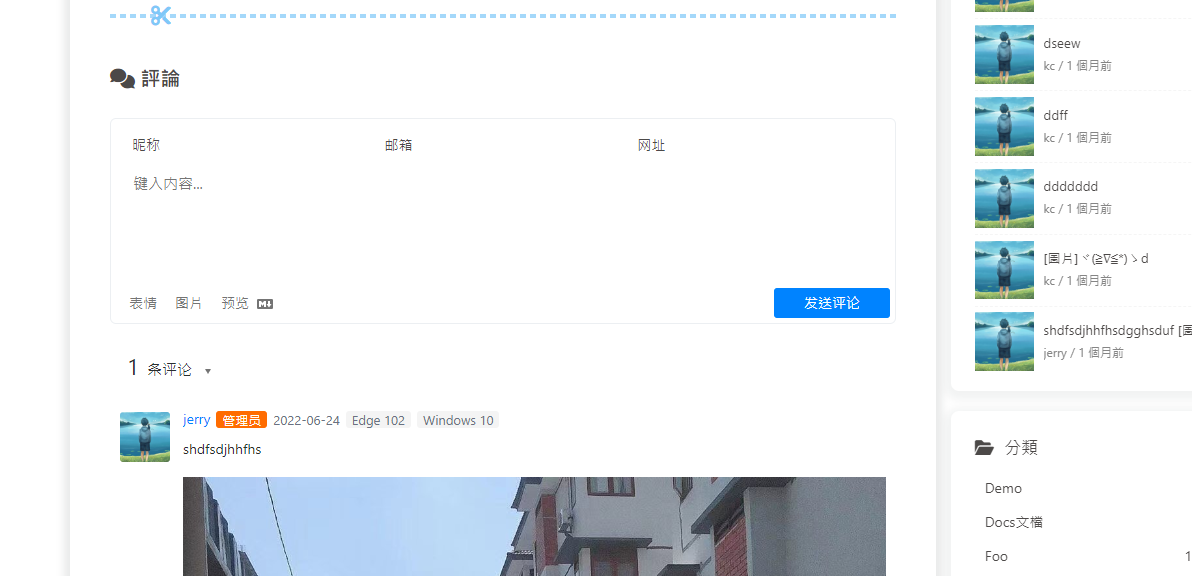
单评论

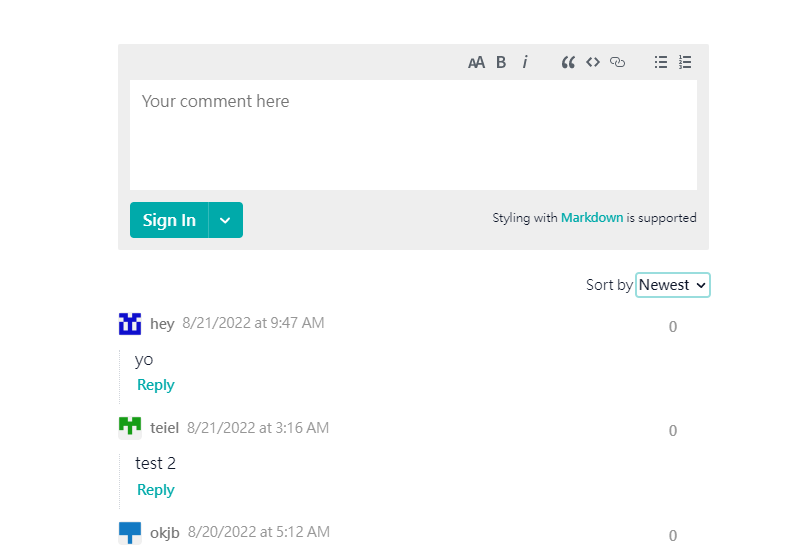
butterfly-docs-04-single-comments

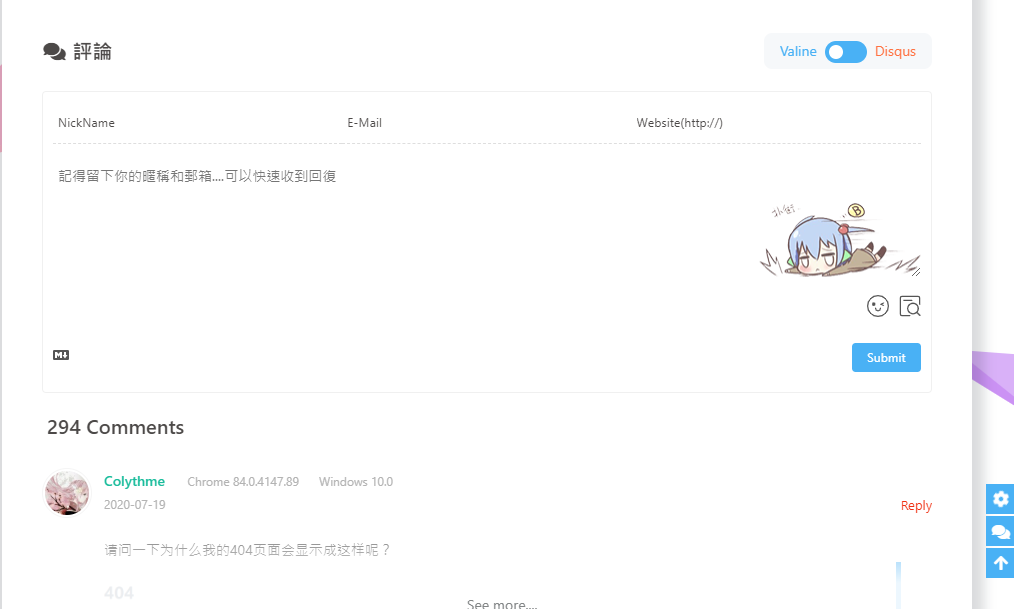
双评论

butterfly-docs-04-double-comments

显示text

butterfly-docs-04-double-comments

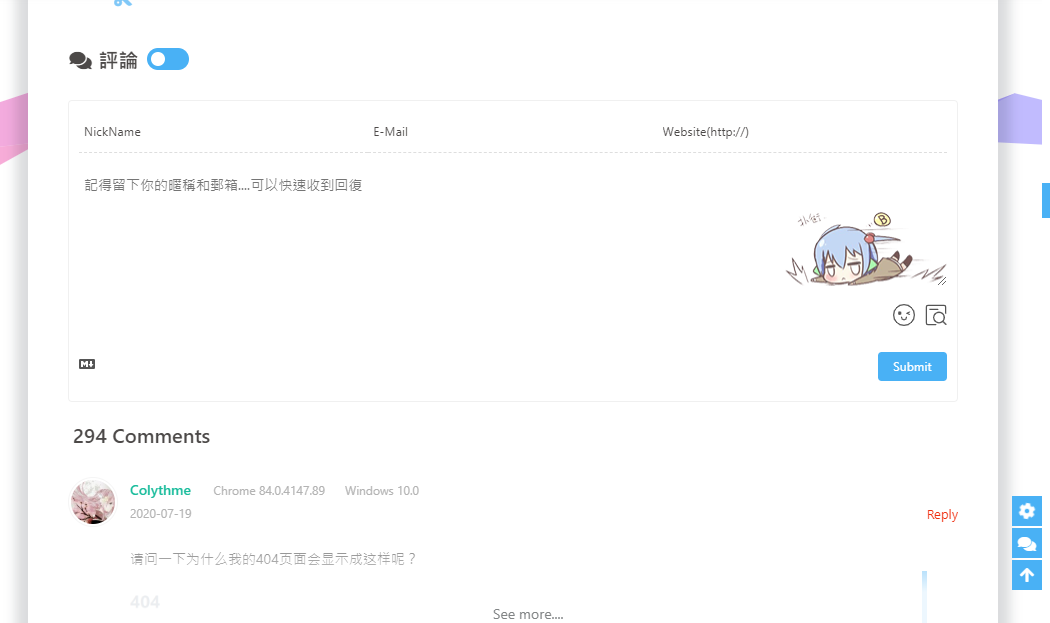
不显示text

butterfly-docs-04-double-comments-not-text

注册 disqus,配置你自己的 disqus,然后在Butterfly里开启它。

修改 主题配置文件

1
2
disqus:
shortname:

butterfly-docs-04-disqus-new

与Disqus一样,但由于Disqus在中国大陆无法访问, 使用Disqusjs可以在无法访问Disqus时显示评论。具体可参考Disqusjs

修改 主题配置文件

1
2
3
4
disqusjs:
shortname:
apikey:
option:

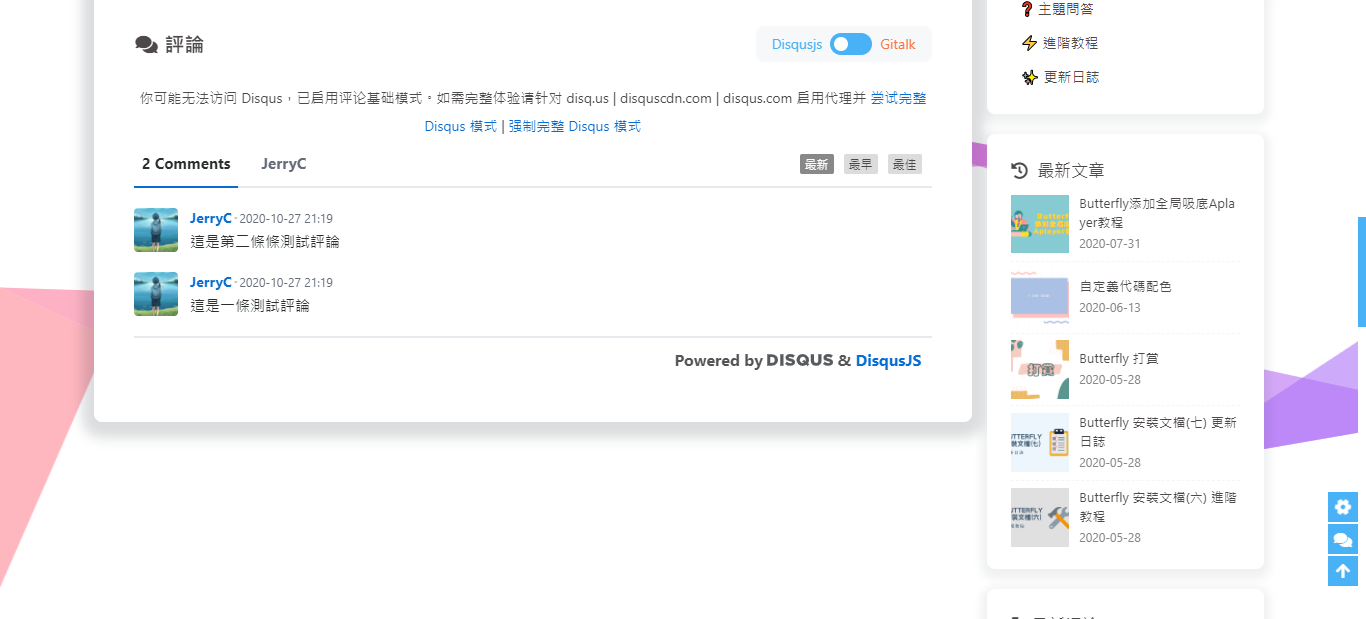
当无法访问 Disqus 时,会显示

butterfly-docs-04-disqusjs-new

注册来必力,配置你自己的来必力设置,然后在Butterfly里开启它。

修改 主题配置文件

1
2
livere:
uid:

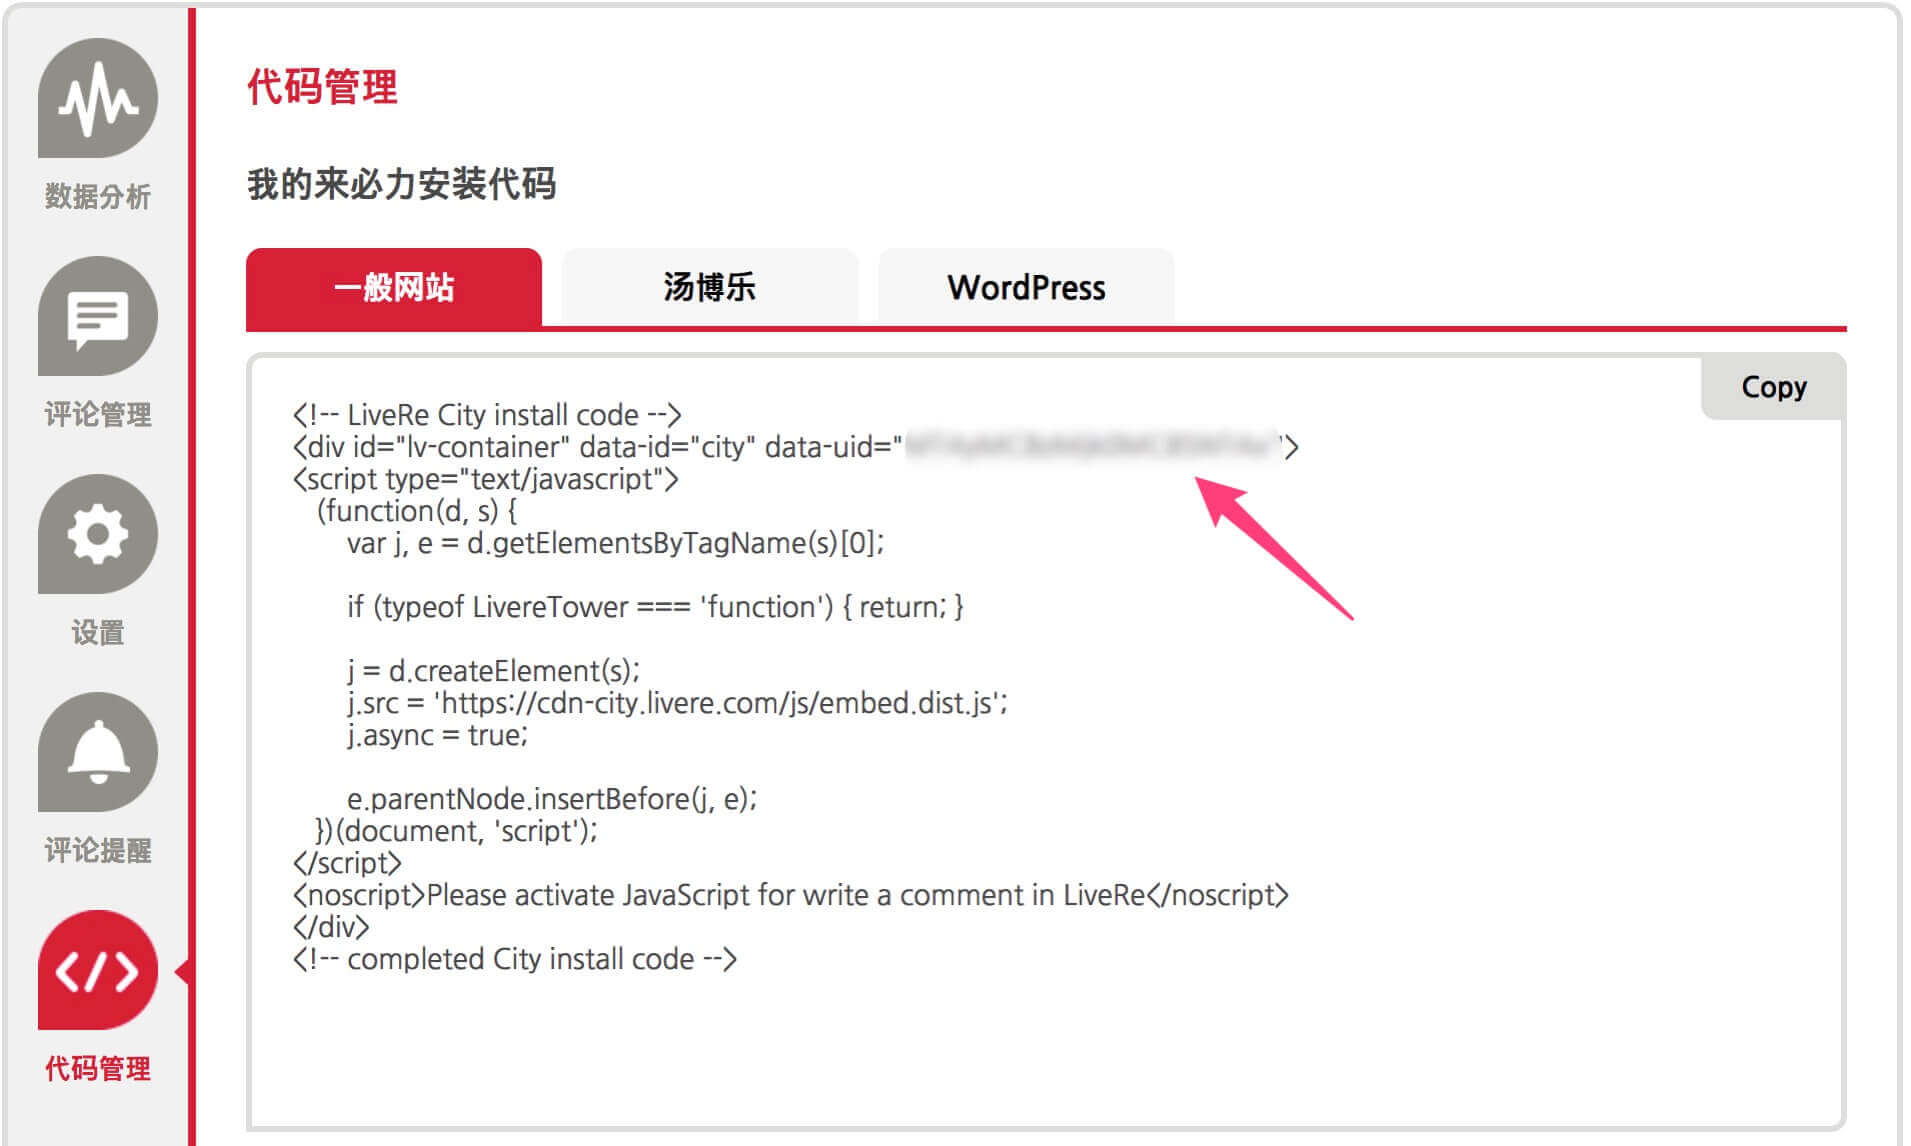
laibili 的 uid 你能在这里找到:

butterfly-docs-04-laibili

butterfly-docs-04-laibili_2-new

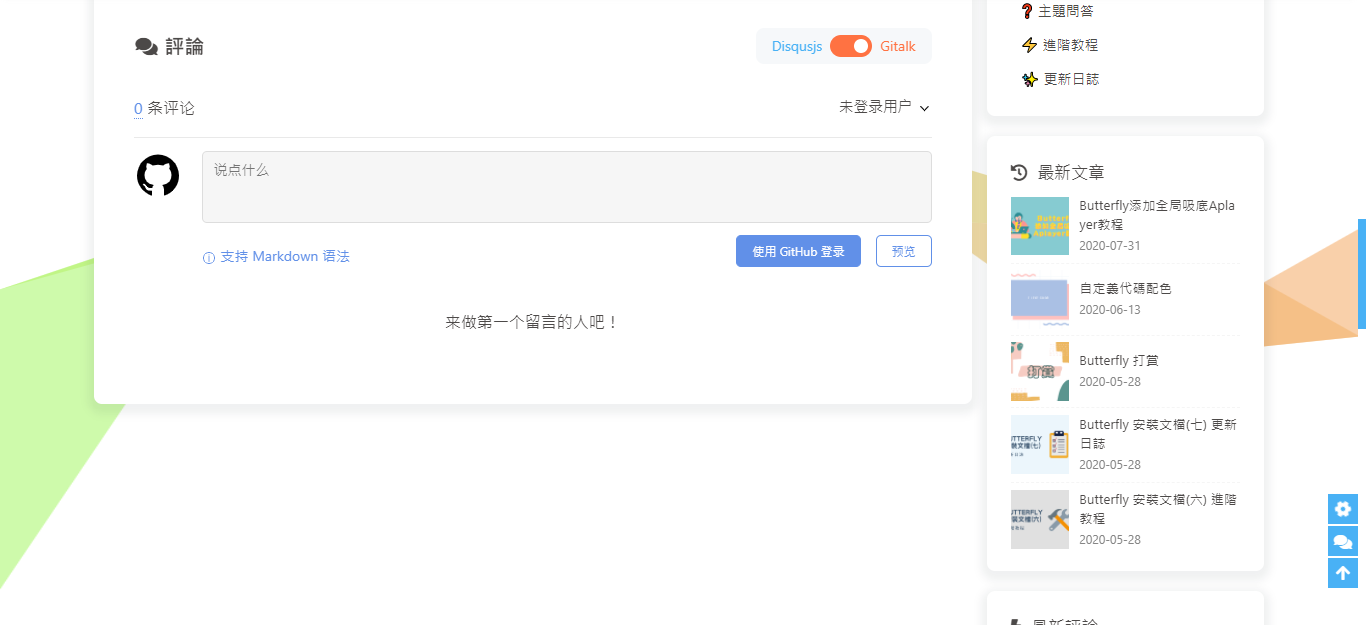
遵循 gitalk的指示去获取你的 github Oauth 应用的 client id 和 secret 值。以及查看它的相关配置説明。

然后修改 主题配置文件:

1
2
3
4
5
6
7
gitalk:
client_id:
client_secret:
repo:
owner:
admin:
option:

butterfly-docs-04-gitalk-new

遵循 Valine的指示去配置你的 LeanCloud 应用。以及查看相应的配置説明。

然后修改 主题配置文件:

1
2
3
4
5
6
7
8
valine:
appId: # leancloud application app id
appKey: # leancloud application app key
avatar: monsterid # gravatar style https://valine.js.org/#/avatar
serverURLs: # This configuration is suitable for domestic custom domain name users, overseas version will be automatically detected (no need to manually fill in)
bg: # valine background
visitor: false
option:

开启 visitor 后,文章页的访问人数将改为 Valine 提供,而不是 不蒜子

Valine于 v1.4.5 开始支持自定义表情,如果你需要自行配置,请在emojiCDN配置表情 CDN。

同时在Hexo 工作目录下的source/_data/创建一个json文件valine.json,等同于 Valine 需要配置的emojiMapsvaline.json配置方式可参考如下

valine.json

1
2
3
4
5
6
7
8
9
10
11
12
13
14
15
16
17
18
19
20
21
22
23
24
{ 
"tv_doge": "6ea59c827c414b4a2955fe79e0f6fd3dcd515e24.png",
"tv_亲亲": "a8111ad55953ef5e3be3327ef94eb4a39d535d06.png",
"tv_偷笑": "bb690d4107620f1c15cff29509db529a73aee261.png",
"tv_再见": "180129b8ea851044ce71caf55cc8ce44bd4a4fc8.png",
"tv_冷漠": "b9cbc755c2b3ee43be07ca13de84e5b699a3f101.png",
"tv_发怒": "34ba3cd204d5b05fec70ce08fa9fa0dd612409ff.png",
"tv_发财": "34db290afd2963723c6eb3c4560667db7253a21a.png",
"tv_可爱": "9e55fd9b500ac4b96613539f1ce2f9499e314ed9.png",
"tv_吐血": "09dd16a7aa59b77baa1155d47484409624470c77.png",
"tv_呆": "fe1179ebaa191569b0d31cecafe7a2cd1c951c9d.png",
"tv_呕吐": "9f996894a39e282ccf5e66856af49483f81870f3.png",
"tv_困": "241ee304e44c0af029adceb294399391e4737ef2.png",
"tv_坏笑": "1f0b87f731a671079842116e0991c91c2c88645a.png",
"tv_大佬": "093c1e2c490161aca397afc45573c877cdead616.png",
"tv_大哭": "23269aeb35f99daee28dda129676f6e9ea87934f.png",
"tv_委屈": "d04dba7b5465779e9755d2ab6f0a897b9b33bb77.png",
"tv_害羞": "a37683fb5642fa3ddfc7f4e5525fd13e42a2bdb1.png",
"tv_尴尬": "7cfa62dafc59798a3d3fb262d421eeeff166cfa4.png",
"tv_微笑": "70dc5c7b56f93eb61bddba11e28fb1d18fddcd4c.png",
"tv_思考": "90cf159733e558137ed20aa04d09964436f618a1.png",
"tv_惊吓": "0d15c7e2ee58e935adc6a7193ee042388adc22af.png"
}

butterfly-docs-04-valine

default_avatar

参数 效果
留空(默认)
mp
identicon
monsterid
wavatar
retro
robohash
blank
404

Waline - 一款从 Valine 衍生的带后端评论系统。可以将 Waline 等价成 With backend Valine。

具体配置可参考 waline 文档

然后修改 主题配置文件:

1
2
3
4
5
waline:
serverURL: # Waline server address url
bg: # waline background
pageview: false
option:

开启 pageview 后,文章页的访问人数将改为 Waline 提供,而不是 不蒜子

butterfly-docs-04-valine

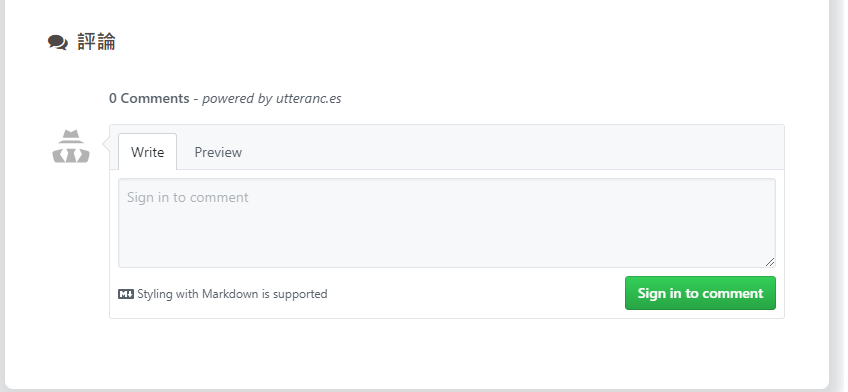
与Gitalk一样,基于 GitHub issues 的评论工具。相对于Gitalk,其相对需要权限较少。具体配置可参考Utterances

修改 主题配置文件:

1
2
3
4
5
6
7
utterances:
repo:
# 可选 pathname/url/title/og:title
issue_term: pathname
# 可选 github-light/github-dark/github-dark-orange/icy-dark/dark-blue/photon-dark
light_theme: github-light
dark_theme: photon-dark

butterfly-docs-04-Utterances

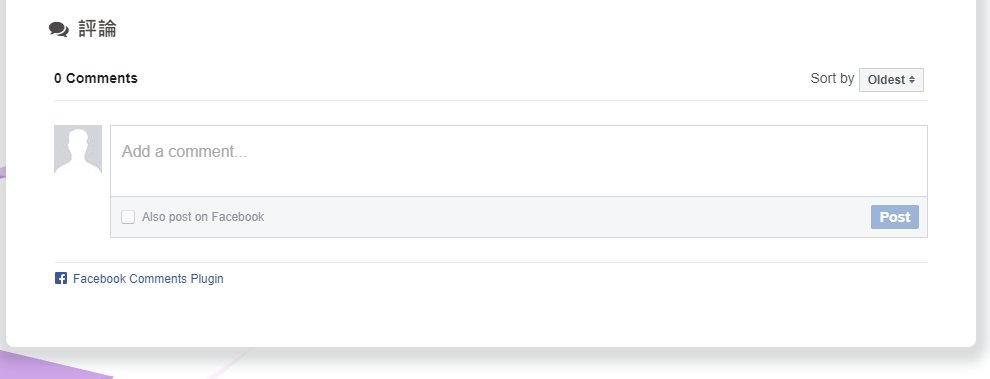
Facebook Comments是Facebook提供的评论插件,需要登陆Facebook才可评论。

修改 主题配置文件

1
2
3
4
5
6
7
8
# Facebook Comments Plugin
# https://developers.facebook.com/docs/plugins/comments/
facebook_comments:
app_id:
user_id: # optional
pageSize: 10 # The number of comments to show
order_by: social # social/time/reverse_time
lang: en_US # Language en_US/zh_CN/zh_TW and so on

butterfly-docs-04-facebook-comments

Twikoo 是一个简洁、安全、无后端的静态网站评论系统,基于腾讯云开发

具体如何配置评论,请查看 Twikoo文档

你只需要把获取到的 环境ID (envId) 填写到配置上去就行

修改 主题配置文件

1
2
3
4
5
twikoo:
envId:
region:
visitor: false
option:
参数 解释
envId 环境 ID
region 环境地域,默认为 ap-shanghai,如果您的环境地域不是上海,需传此参数
visitor 是否显示文章閲读数
option 可选配置

开启 visitor 后,文章页的访问人数将改为 Twikoo 提供,而不是 不蒜子
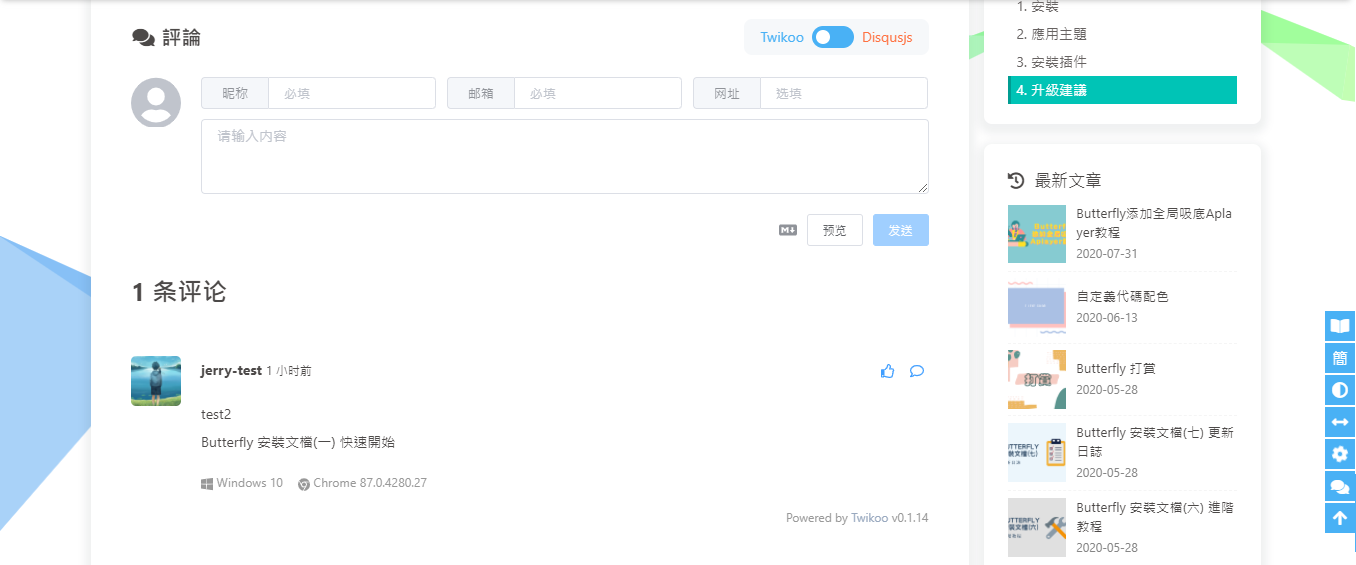
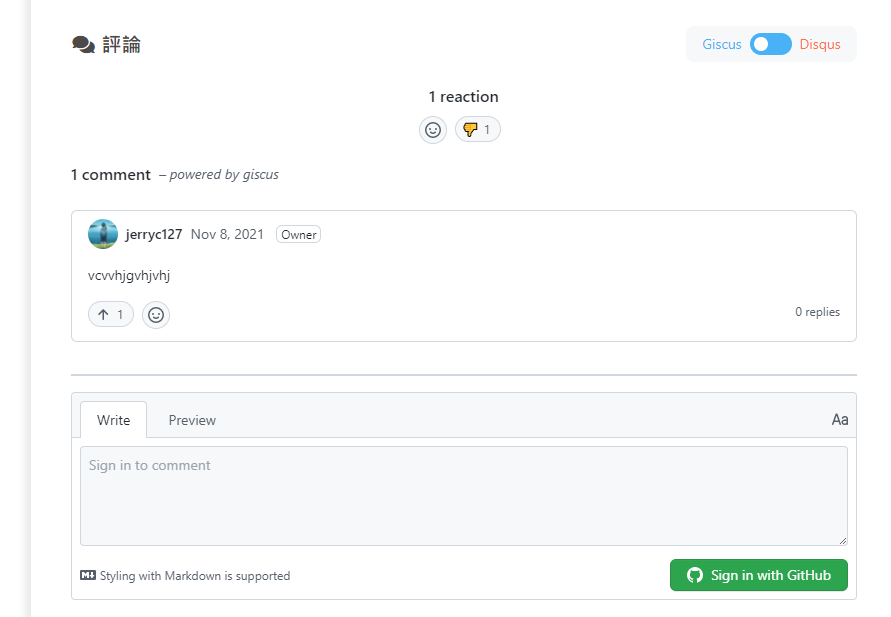
一个基于 GitHub Discussions 的评论

1
2
3
4
5
6
7
8
9
10
# Giscus
# https://giscus.app/
giscus:
repo:
repo_id:
category_id:
theme:
light: light
dark: dark
option:

具体配置的意思,请参考 Giscus 的文档

butterfly-docs-04-giscus

remark42 是一款只支持私有部署的评论

具体部署请查看 Installation | Remark42

1
2
3
4
remark42:
host: # Your Host URL
siteId: # Your Site ID
option:

butterfly-docs-04-remark42

artalk 是一款只支持私有部署的评论

具体部署请查看 Artalk | 自託管评论系统

1
2
3
4
5
artalk:
server:
site:
visitor: false
option:

butterfly-docs-04-artalk

在綫聊天

从3.0开始,Butterfly主题内置了多种在綫聊天工具。你可以选择开启一种,方便你与访客的交流。

这些工具都提供了一个按钮可以打开/关闭聊天窗口。
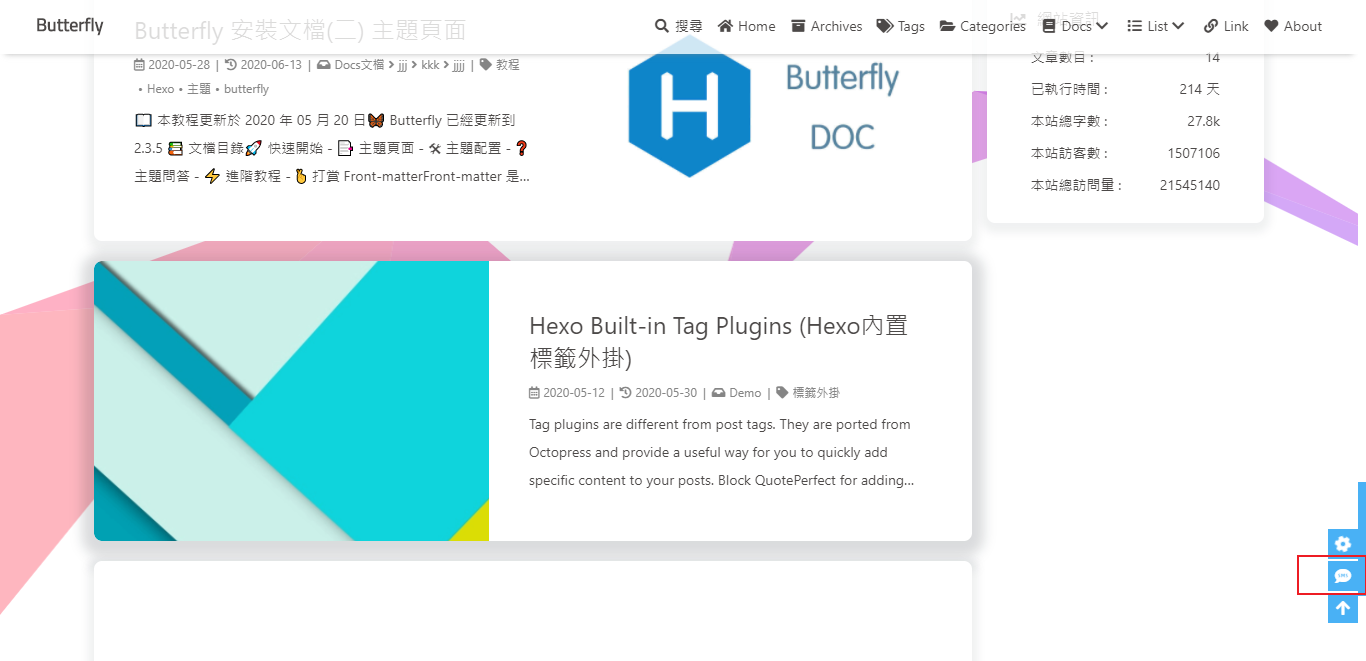
主题也提供了一个集合主题特色的按钮来替换这些工具本身的按钮,这个聊天按钮将会出现在右下角里。
你只需要把chat_btn打开就行。

修改 主题配置文件

1
2
3
# Chat Button [recommend]
# It will create a button in the bottom right corner of website, and hide the origin button
chat_btn: true

butterfly-docs-04-chat-button

为了不影响访客的体验,主题提供一个chat_hide_show配置
设为true后,使用工具提供的按钮时,只有向上滚动才会显示聊天按钮,向下滚动时会隐藏按钮。

修改 主题配置文件

1
2
# The origin chat button is displayed when scrolling up, and the button is hidden when scrolling down
chat_hide_show: true

如果使用工具自带的聊天按钮,按钮位置可能会遮挡右下角图标,请配置rightside-bottom调正右下角图标位置

配置chatra,需要知道Public key

打开chatra并注册账号。
你可以在Preferences中找到Public key
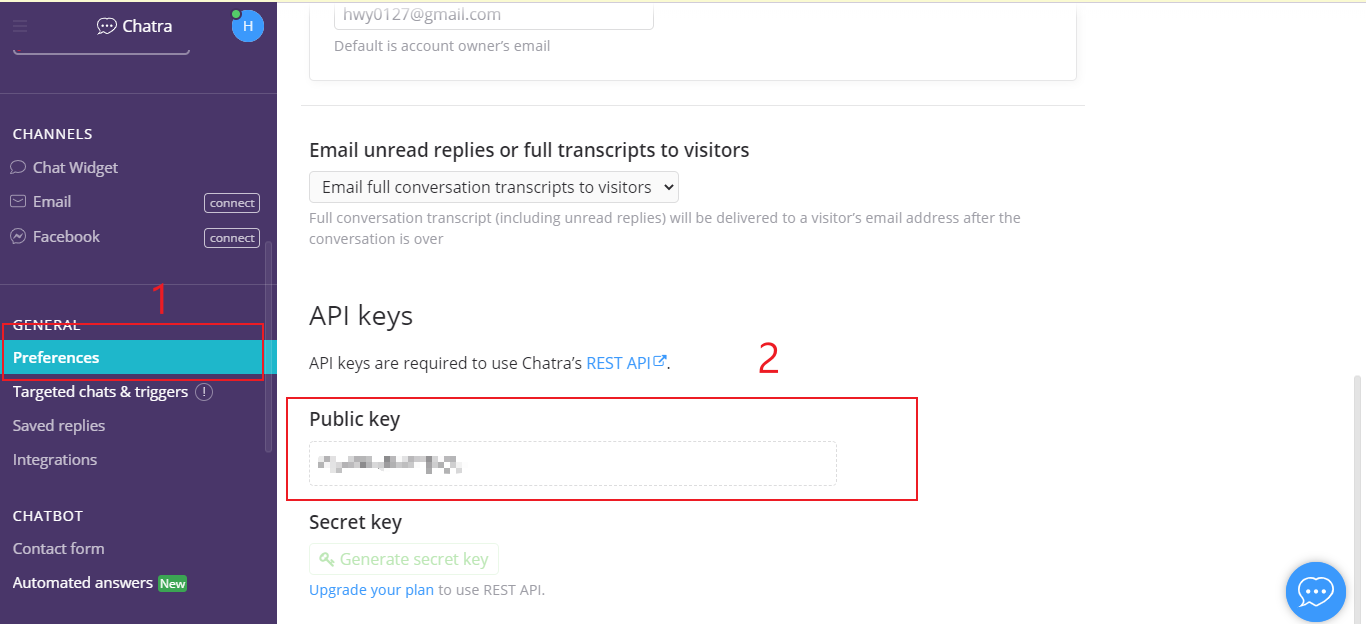
butterfly-docs-04-chat-chatra-id

修改 主题配置文件

1
2
3
4
5
# chatra
# https://chatra.io/
chatra:
enable: true
id: xxxxxxxx

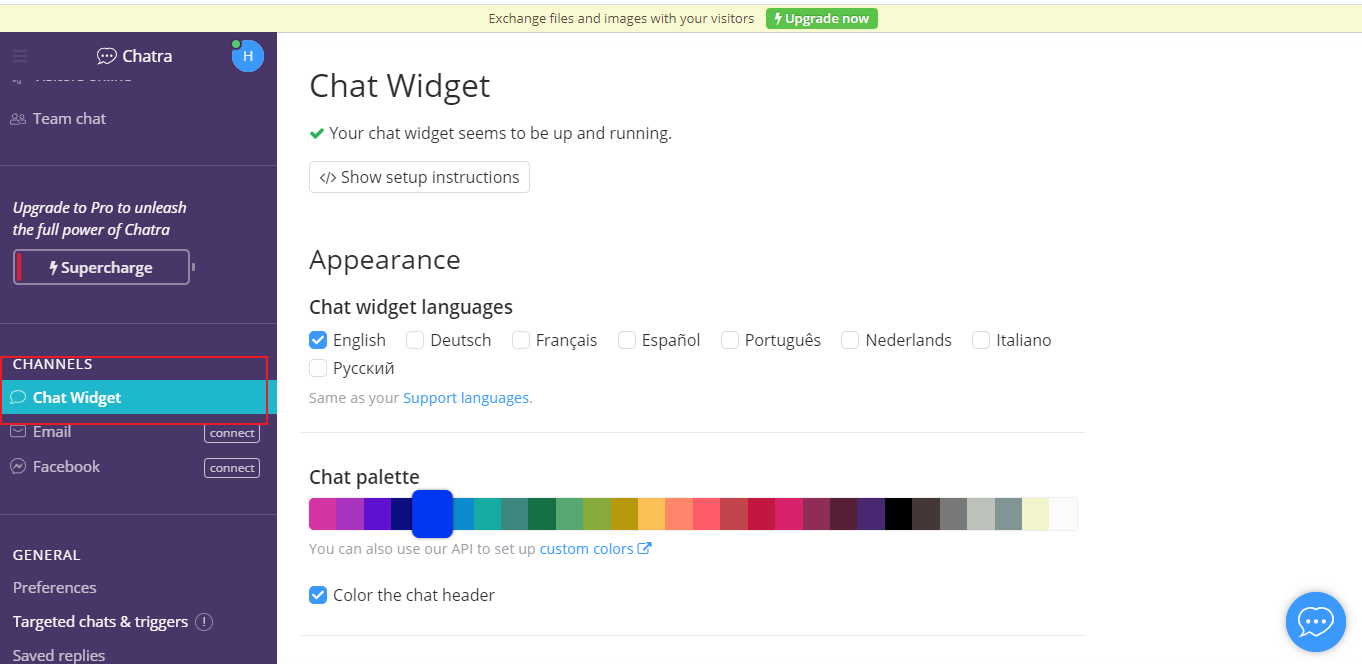
chatra的样式你可以Chat Widget自行配置

butterfly-docs-04-chat-chatra-ui-settings

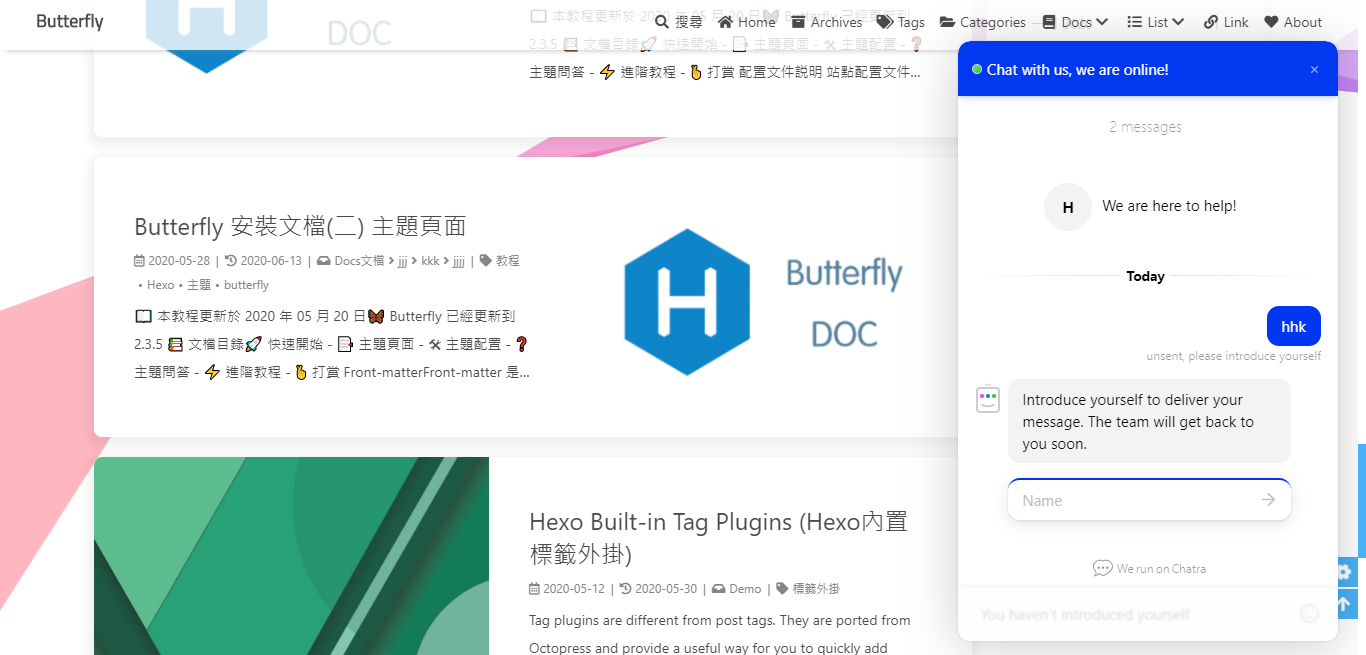
Demo

butterfly-docs-04-chat-chatra-ui-demo

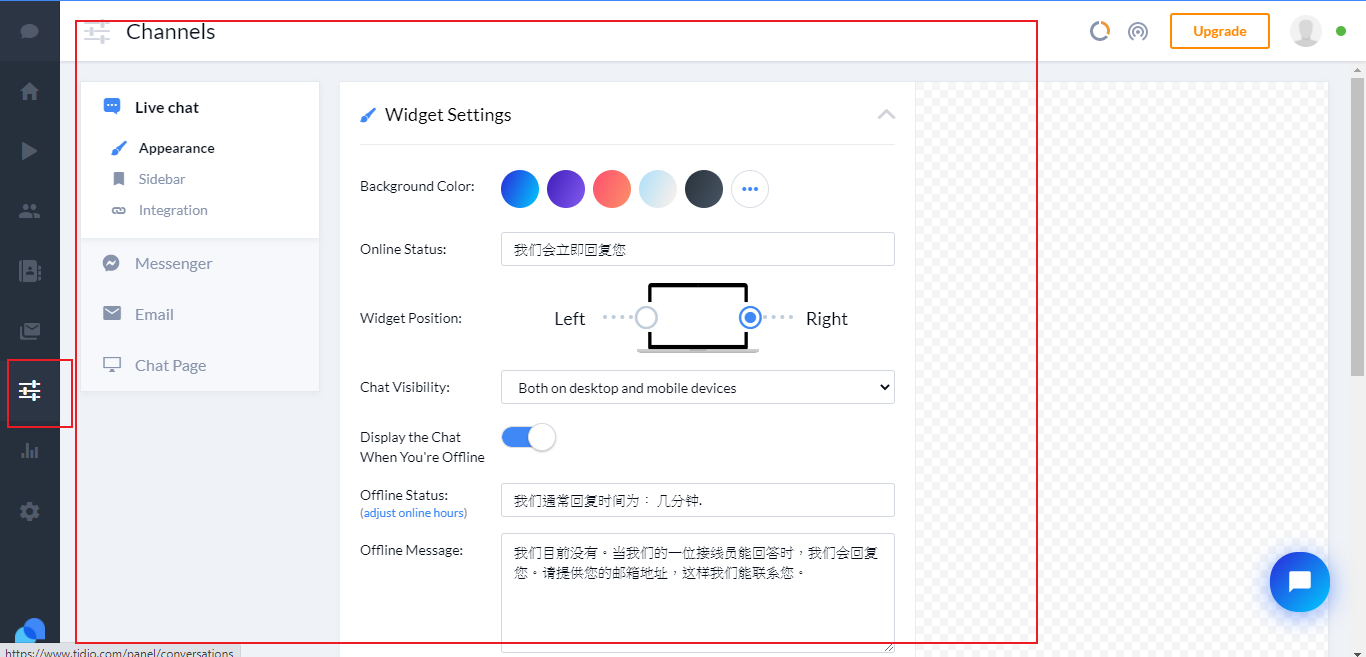
配置tidio,需要知道Public key

打开tidio并注册账号。
你可以在Preferences > Developer中找到Public key
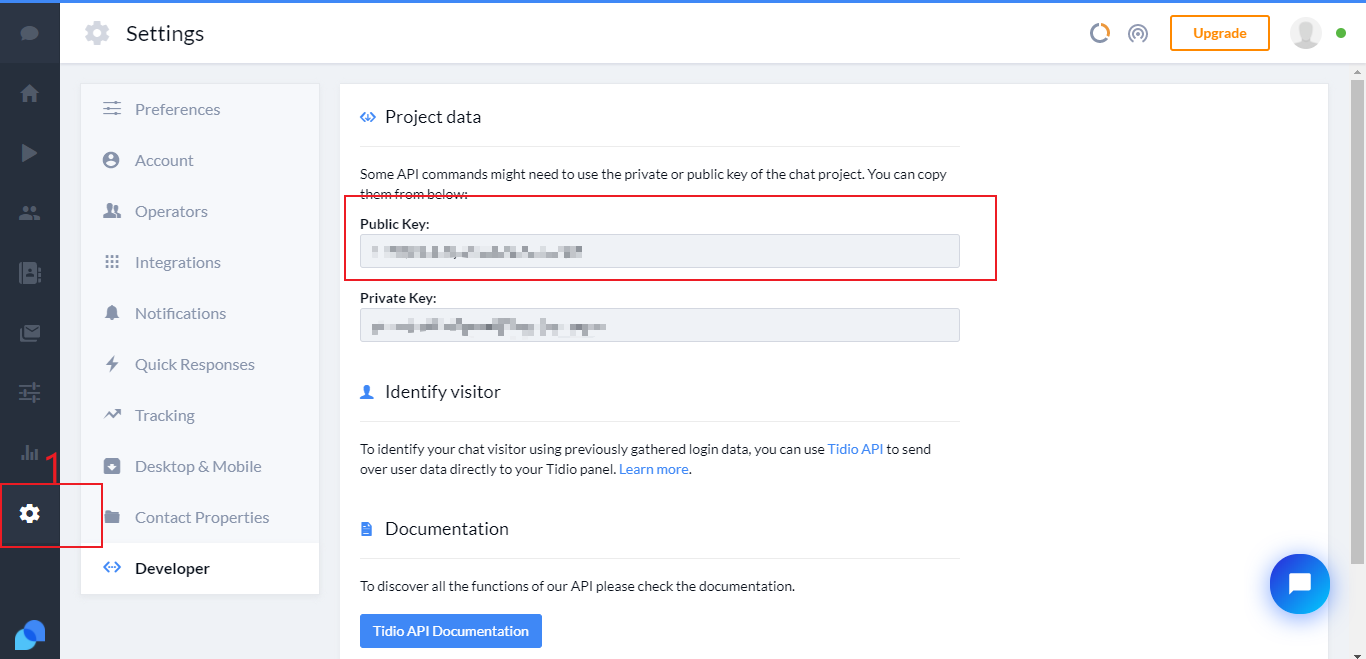
butterfly-docs-04-chat-tidio-id

修改 主题配置文件

1
2
3
4
5
# tidio
# https://www.tidio.com/
tidio:
enable: true
public_key: XXXX

tidio的样式你可以Channels自行配置

butterfly-docs-04-chat-tidio-setting

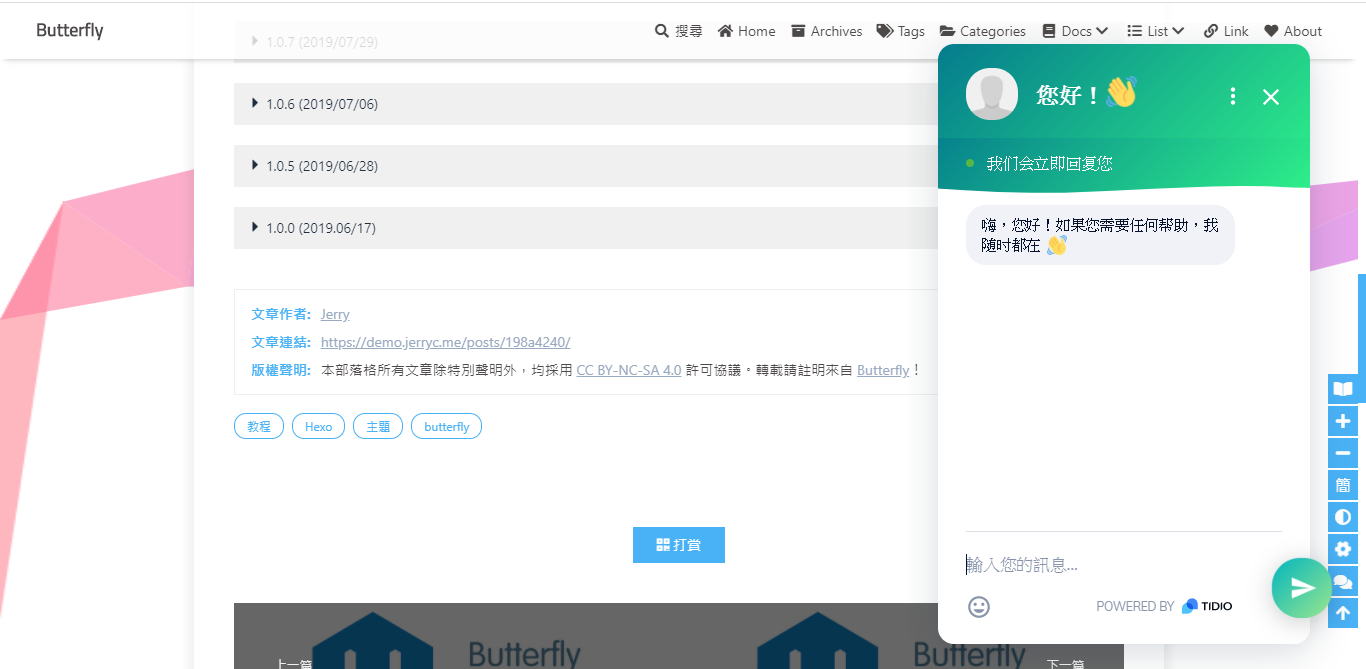
Demo

butterfly-docs-04-chat-tidio-demo

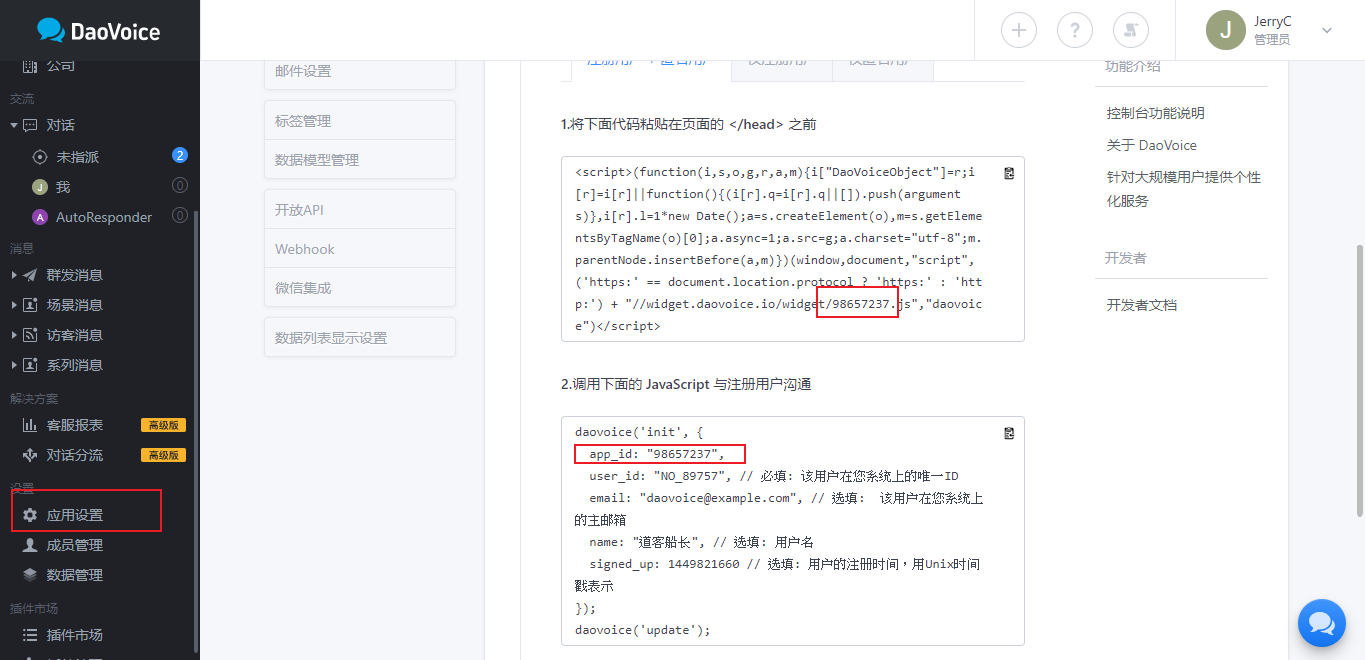
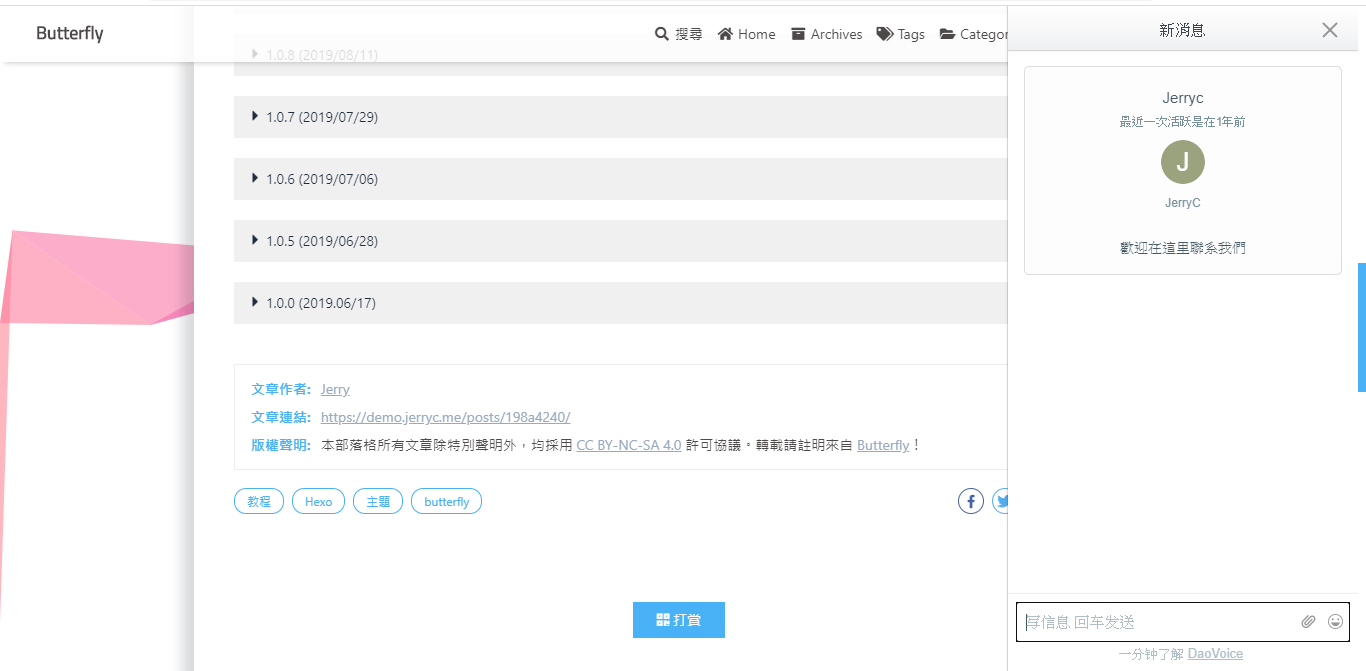
打开daovoice和注册帐号
找到你的app id

butterfly-docs-04-chat-daovoice-appid

修改 主题配置文件

1
2
3
4
5
# daovoice
# http://daovoice.io/
daovoice:
enable: true
app_id: xxxxx

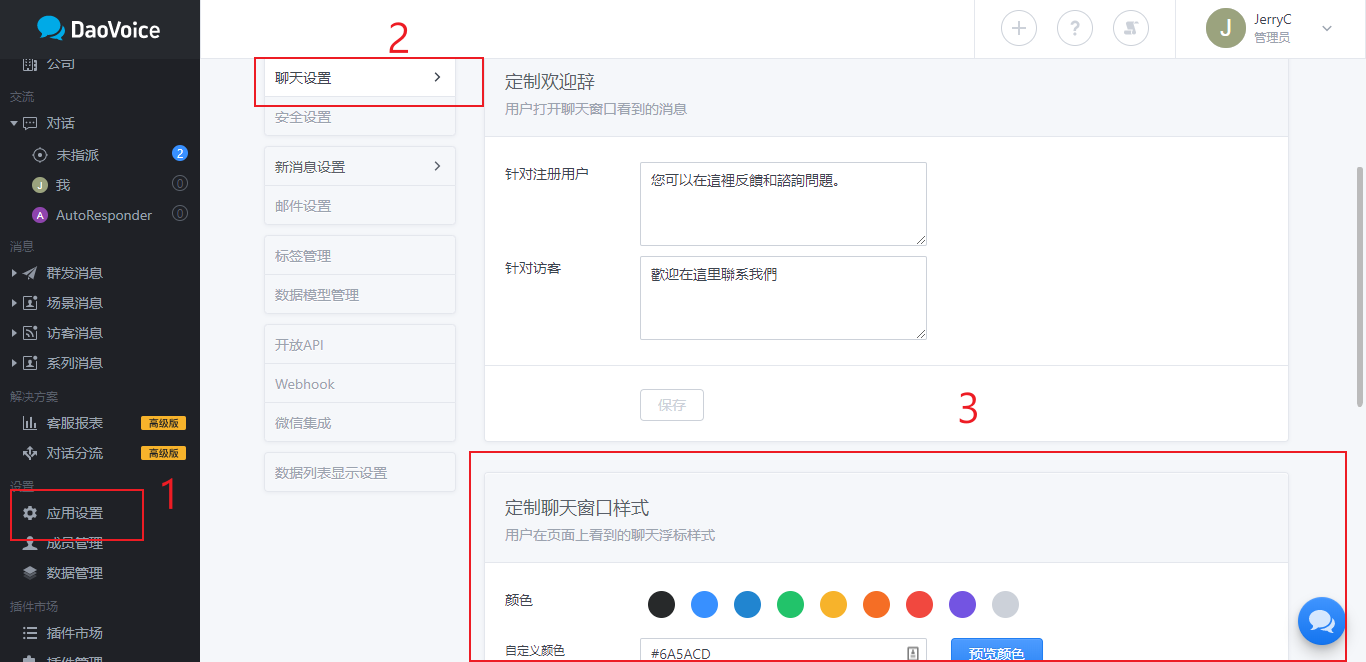
可在聊天设置里配置聊天按钮等样式

butterfly-docs-04-chat-daovoice-ui

Demo

butterfly-docs-04-chat-daovoice-demo

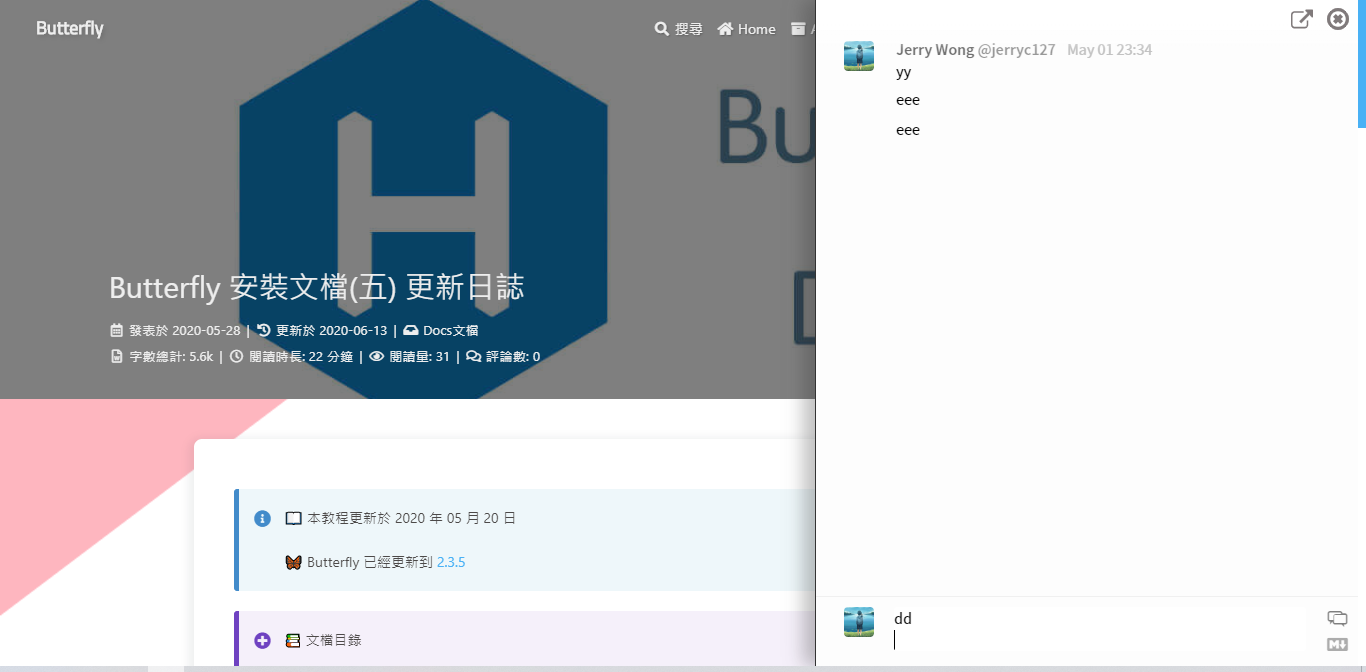
打开Gitter和注册账号
创建一个community或者room,複制名称到设置去
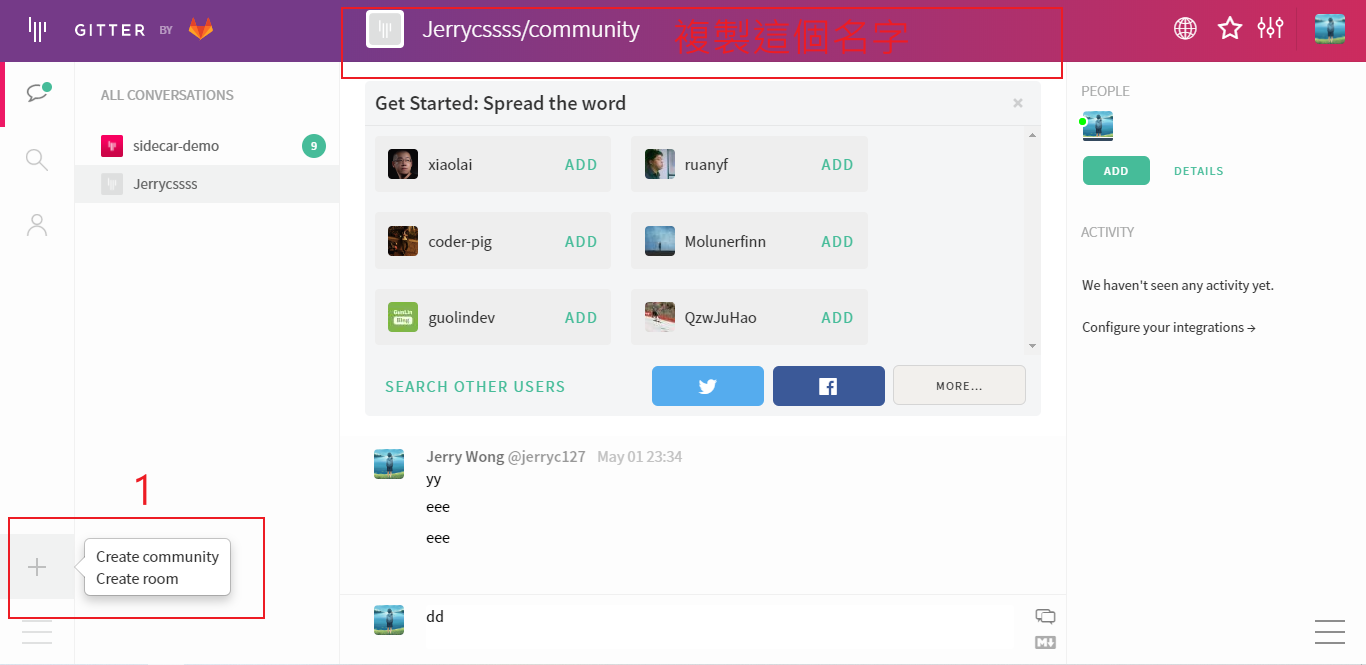
butterfly-docs-04-chat-gitter-setting

修改 主题配置文件

1
2
3
4
5
# gitter
# https://gitter.im/
gitter:
enable: true
room:

Demo

butterfly-docs-04-chat-gitter-ui

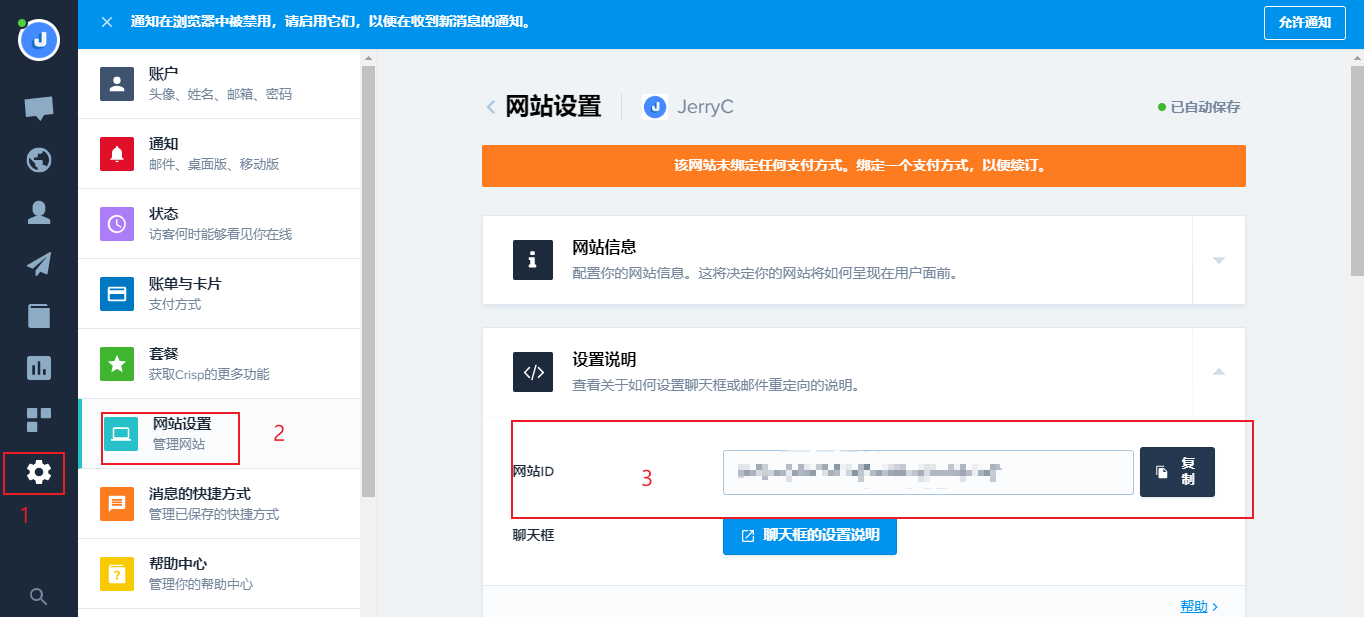
打开crisp并注册帐号

找到需要的网站ID

1
2
3
4
5
# crisp
# https://crisp.chat/en/
crisp:
enable: false
website_id: xxxxxxxx

butterfly-docs-04-chat-crisp

butterfly-docs-04-crisp-demo

messenger 为 Facebook 旗下的聊天服务

具体操作请查看 Facebook 洽谈附加程式 - Messenger 平台

1
2
3
4
messenger:
enable: false
pageID: xxxxx
lang: zh_TW # Language en_US/zh_CN/zh_TW and so on

butterfly-docs-04-messege

分享

只能选择一个分享服务商

访问 AddThis 官网
找到你的 pub-id

butterfly-docs-04-addthis

修改 主题配置文件

1
2
3
addThis:
enable: true # or false
pubid: 你的pub-id

如果你不知道 sharejs,看看它的説明。

修改 主题配置文件

1
2
3
sharejs:
enable: true
sites: facebook,twitter,wechat,weibo,qq #想要显示的内容

butterfly-docs-04-sharejs

可以到addtoany查看使用説明

1
2
3
addtoany:
enable: true
item: facebook,twitter,wechat,sina_weibo,facebook_messenger,email,copy_link

butterfly-docs-04-addtoany

搜索系统

网站验证

如果需要搜索引擎收录网站,可能需要登录对应搜索引擎的管理平台进行提交。
各自的验证码可从各自管理平台拿到

修改 主题配置文件

1
2
3
4
5
site_verification:
# - name: google_site_verification
# content: xxxxxx
# - name: baidu_site_verification
# content: xxxxxxx

分析统计

  1. 登录百度统计的官方网站

  2. 找到你百度统计的统计代码

butterfly-docs-04-baidu-tongji

  1. 修改 主题配置文件
1
baidu_analytics: 你的代码
  1. 登录谷歌分析的官方网站

  2. 找到你的谷歌分析的跟踪 ID

butterfly-docs-04-google-analytics

  1. 修改 主题配置文件
1
google_analytics: 你的代码 # 通常以`UA-`打头
  1. 登录CNZZ分析的官方网站
  2. 找到 站点设置 - 获取代码
  3. 找到你的 web_id

butterfly-docs-04-CNZZ-analysic

  1. 修改 主题配置文件
1
cnzz_analytics: 
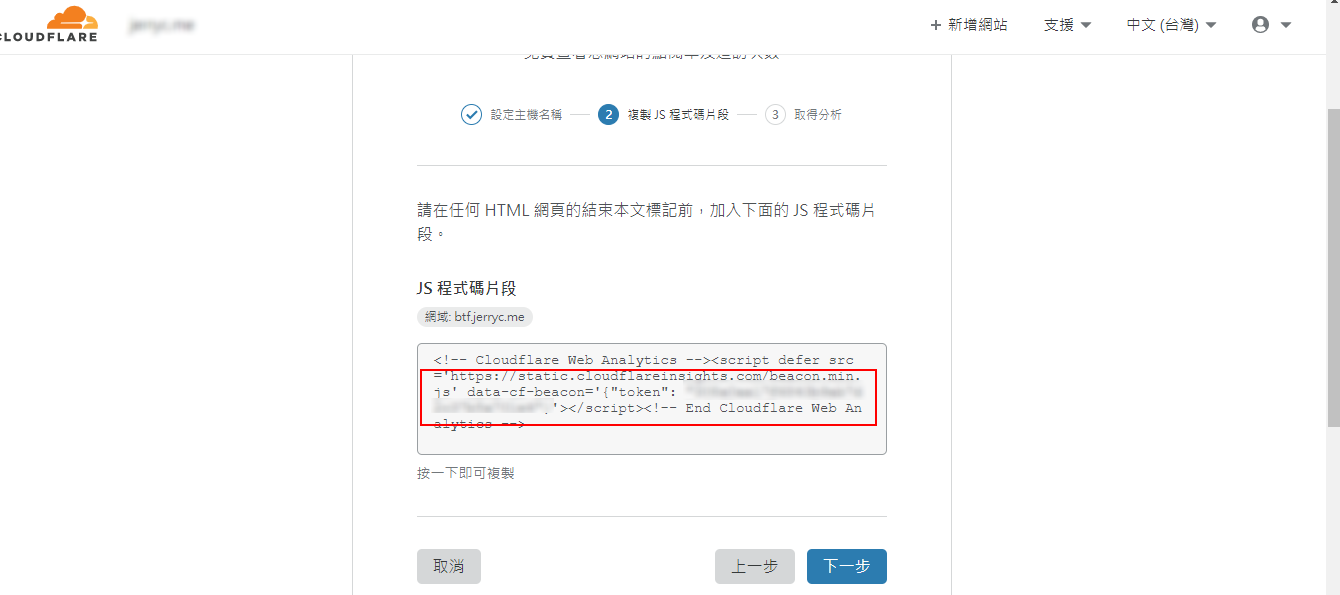
  1. 登录 Cloudflare 分析的官方网站
  2. 找到 JavaScript 程式码片段
  3. 找到你的 token

butterfly-docs-04-cloudflare-analytics-id

  1. 修改 主题配置文件

    1
    2
    3
    # Cloudflare Analytics
    # https://www.cloudflare.com/zh-tw/web-analytics/
    cloudflare_analytics:
  1. 登录 Clarity 的官方网站

  2. 创建 PROJECT

  3. 找到你的 IDbutterfly-docs-04-clarity-id

  4. 修改 主题配置文件

    1
    2
    3
    # Microsoft Clarity
    # https://clarity.microsoft.com/
    microsoft_clarity:

广告

主题已集成谷歌广告(自动广告)

修改 主题配置文件

1
2
3
4
5
6
google_adsense:
enable: true
auto_ads: true
js: https://pagead2.googlesyndication.com/pagead/js/adsbygoogle.js
client: # 填入个人识别码
enable_page_level_ads: true

butterfly-docs-04-google-adsense1

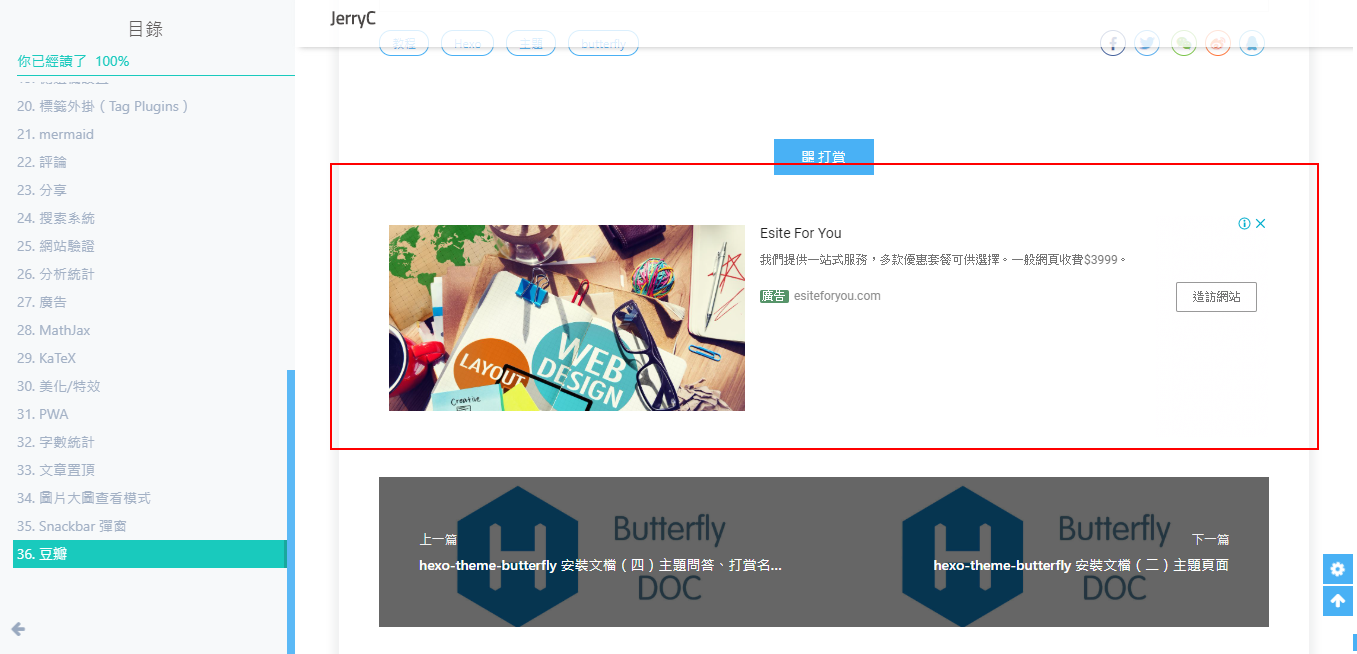
主题预留了三个位置可供插入广告,分别为主页文章(每三篇文章出现广告)/aside公告之后/文章页打赏之后。
把html代码填写到对应的位置

修改 主题配置文件

1
2
3
4
ad:
index:
aside:
post:

例如:

1
index: <ins class="adsbygoogle" style="display:block" data-ad-format="fluid" data-ad-layout-key="xxxxxxxxxxxx" data-ad-client="ca-pub-xxxxxxxxxx" data-ad-slot="xxxxxxxxxx"></ins><script>(adsbygoogle=window.adsbygoogle||[]).push({})</script>

butterfly-docs-04-ad-post
butterfly-docs-04-ad-index

Math 数学

不要在标题里使用 mathjax 语法,toc 目录不一定能正确显示 mathjax,可能显示 mathjax 代码

建议使用 KaTex 获得更好的效果,下文有介绍!

修改 主题配置文件:

1
2
3
4
5
mathjax:
enable: true
# true 表示每一页都加载mathjax.js
# false 需要时加载,须在使用的Markdown Front-matter 加上 mathjax: true
per_page: false

如果 per_page 设为 true,则每一页都会加载 Mathjax 服务。设为 false,则需要在文章 Front-matter 添加 mathjax: true,对应的文章才会加载 Mathjax 服务。

然后你需要修改一下默认的 markdown 渲染引擎来实现 MathJax 的效果。

查看: hexo-renderer-kramed

以下操作在你 hexo 博客的目录下 (不是 Butterfly 的目录):

  1. 安装插件

    1
    2
    npm uninstall hexo-renderer-marked --save
    npm install hexo-renderer-kramed --save
  2. 配置 hexo 根目录的配置文件

    1
    2
    3
    4
    5
    6
    7
    8
    kramed:
    gfm: true
    pedantic: false
    sanitize: false
    tables: true
    breaks: true
    smartLists: true
    smartypants: true

效果:

butterfly-docs-04-mathjax-2

不要在标题里使用 KaTeX 语法,toc 目录不能正确显示 KaTeX。

首先禁用MathJax(如果你配置过 MathJax 的话),然后修改你的主题配置文件以便加载katex.min.css:

1
2
3
4
5
6
katex:
enable: true
# true 表示每一页都加载katex.js
# false 需要时加载,须在使用的Markdown Front-matter 加上 katex: true
per_page: false
hide_scrollbar: true

你不需要添加 katex.min.js 来渲染数学方程。相应的你需要卸载你之前的 hexo 的 markdown 渲染器,然后安装其它插件。

卸载掉 marked 插件,安装 hexo-renderer-markdown-it

1
2
3
4
5
npm un hexo-renderer-marked --save # 如果有安装这个的话,卸载
npm un hexo-renderer-kramed --save # 如果有安装这个的话,卸载

npm i hexo-renderer-markdown-it --save # 需要安装这个渲染插件
npm install @neilsustc/markdown-it-katex --save #需要安装这个katex插件

在 hexo 的根目录的 _config.yml 中配置

1
2
3
4
5
6
markdown:
plugins:
- plugin:
name: '@neilsustc/markdown-it-katex'
options:
strict: false

如需配置其它参数,请参考 katex 官网

注意,此方法生成的 katex 没有斜体

卸载掉 marked 插件,然后安装新的hexo-renderer-markdown-it-plus:

1
2
3
4
5
6
7
8
9
10
11
# 替换 `hexo-renderer-kramed` 或者 `hexo-renderer-marked` 等hexo的markdown渲染器
# 你可以在你的package.json里找到hexo的markdwon渲染器,并将其卸载
npm un hexo-renderer-marked --save

# or

npm un hexo-renderer-kramed --save


# 然后安装 `hexo-renderer-markdown-it-plus`
npm i @upupming/hexo-renderer-markdown-it-plus --save

注意到 hexo-renderer-markdown-it-plus已经无人持续维护, 所以我们使用 @upupming/hexo-renderer-markdown-it-plus。 这份 fork 的代码使用了 @neilsustc/markdown-it-katex同时它也是 VSCode 的插件 Markdown All in One所使用的, 所以我们可以获得最新的 KaTex 功能例如 \tag{}

你还可以通过 @neilsustc/markdown-it-katex控制 KaTeX 的设置,所有可配置的选项参见 https://katex.org/docs/options.html。 比如你想要禁用掉 KaTeX 在命令行上输出的宂长的警告信息,你可以在根目录的 _config.yml 中使用下面的配置将 strict 设置为 false:

1
2
3
4
5
6
7
markdown_it_plus:
plugins:
- plugin:
name: '@neilsustc/markdown-it-katex'
enable: true
options:
strict: false

当然,你还可以利用这个特性来定义一些自己常用的 macros

因为 KaTeX 更快更轻量,因此没有 MathJax 的功能多(比如右键菜单)。为那些使用 MathJax 的用户,主题也内置了 katex 的 複制 功能。
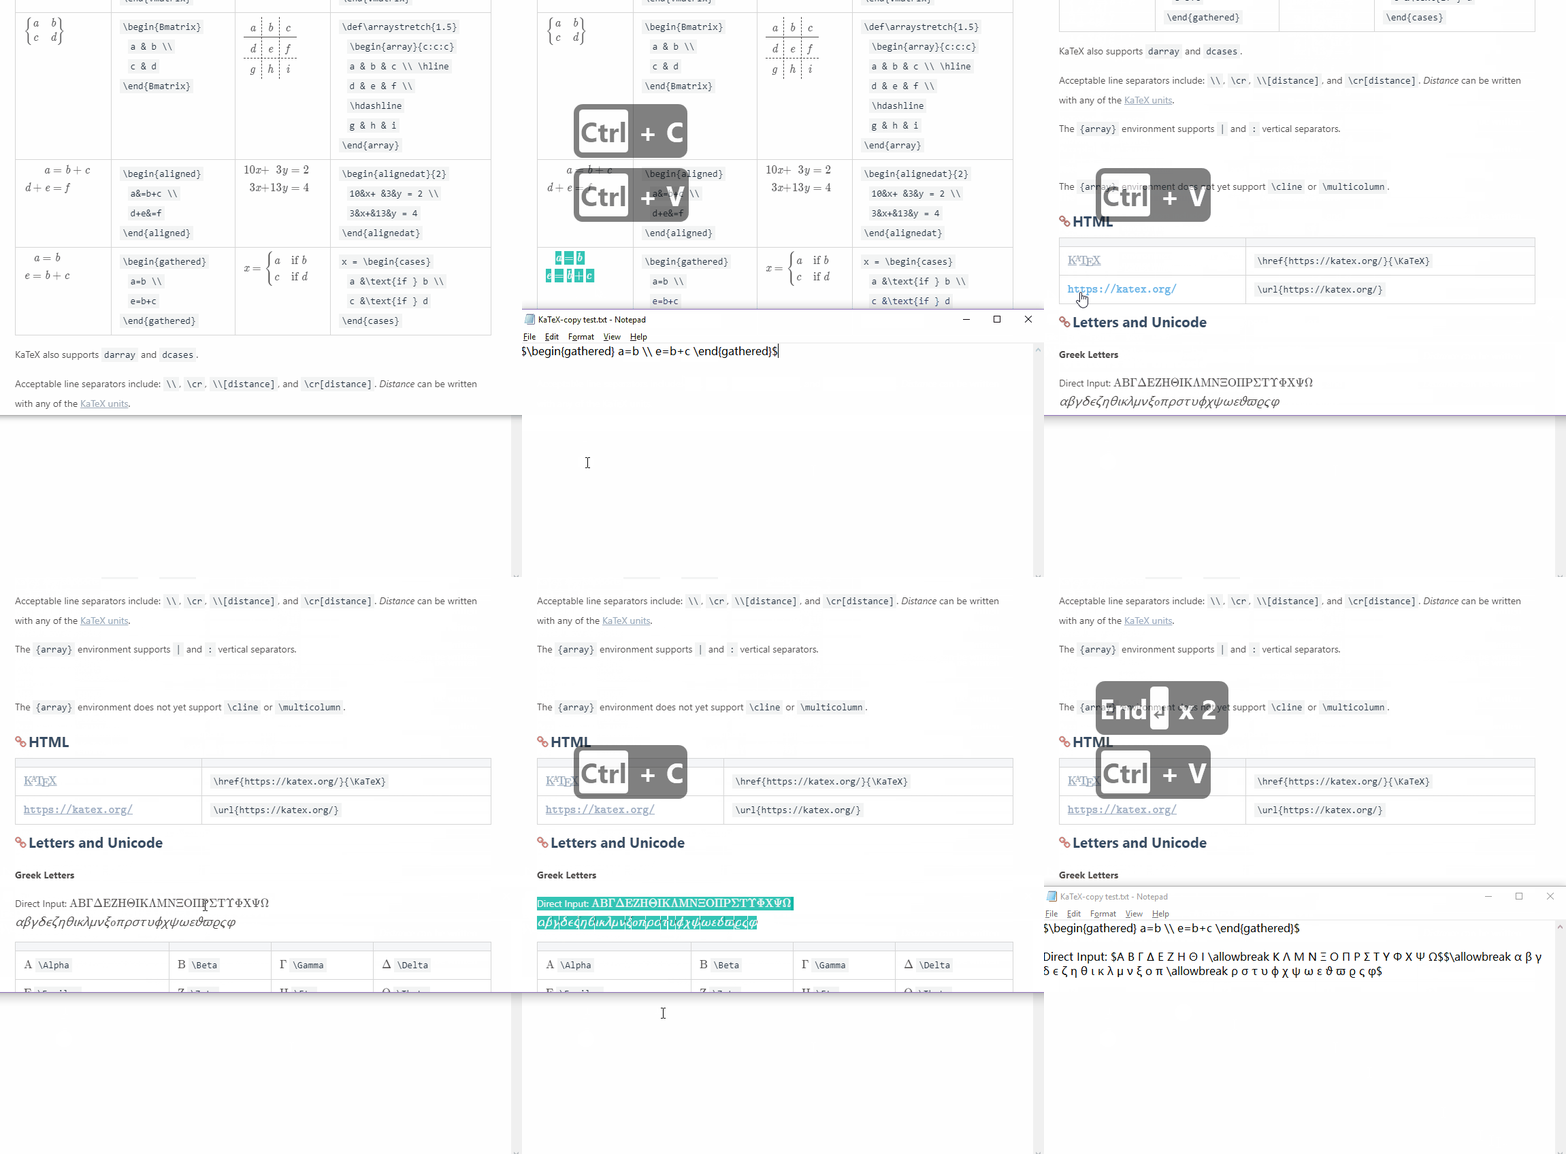
butterfly-docs-04-katex

美化/特效

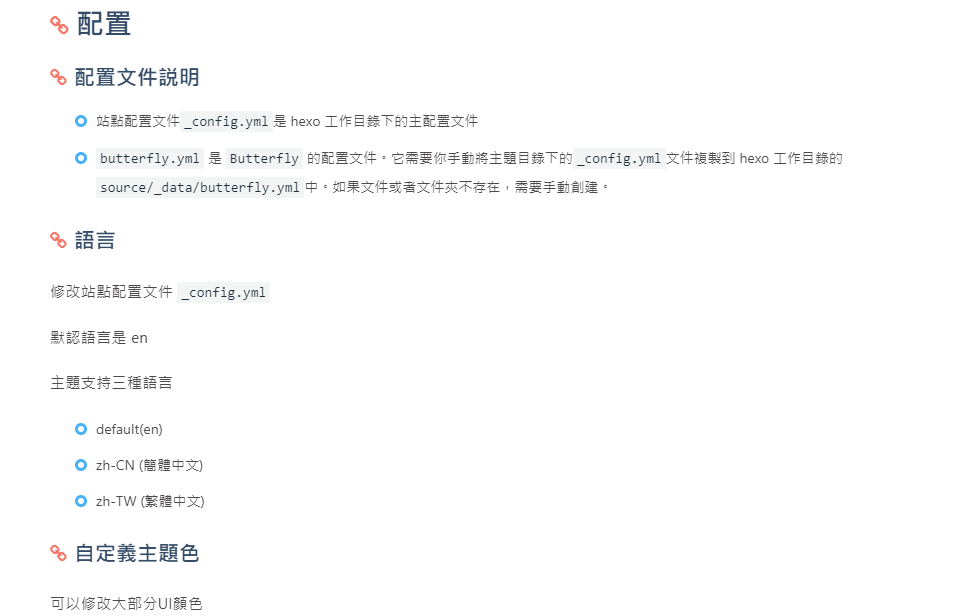
自定义主题色

可以修改大部分UI颜色

修改 主题配置文件,比如:

颜色值必须被双引号包裹,就像"#000"而不是#000。否则将会在构建的时候报错!

1
2
3
4
5
6
7
8
9
10
11
12
13
14
15
theme_color:
enable: true
main: "#49B1F5"
paginator: "#00c4b6"
button_hover: "#FF7242"
text_selection: "#00c4b6"
link_color: "#99a9bf"
meta_color: "#858585"
hr_color: "#A4D8FA"
code_foreground: "#F47466"
code_background: "rgba(27, 31, 35, .05)"
toc_color: "#00c4b6"
blockquote_padding_color: "#49b1f5"
blockquote_background_color: "#49b1f5"
scrollbar_color: "#49b1f5"

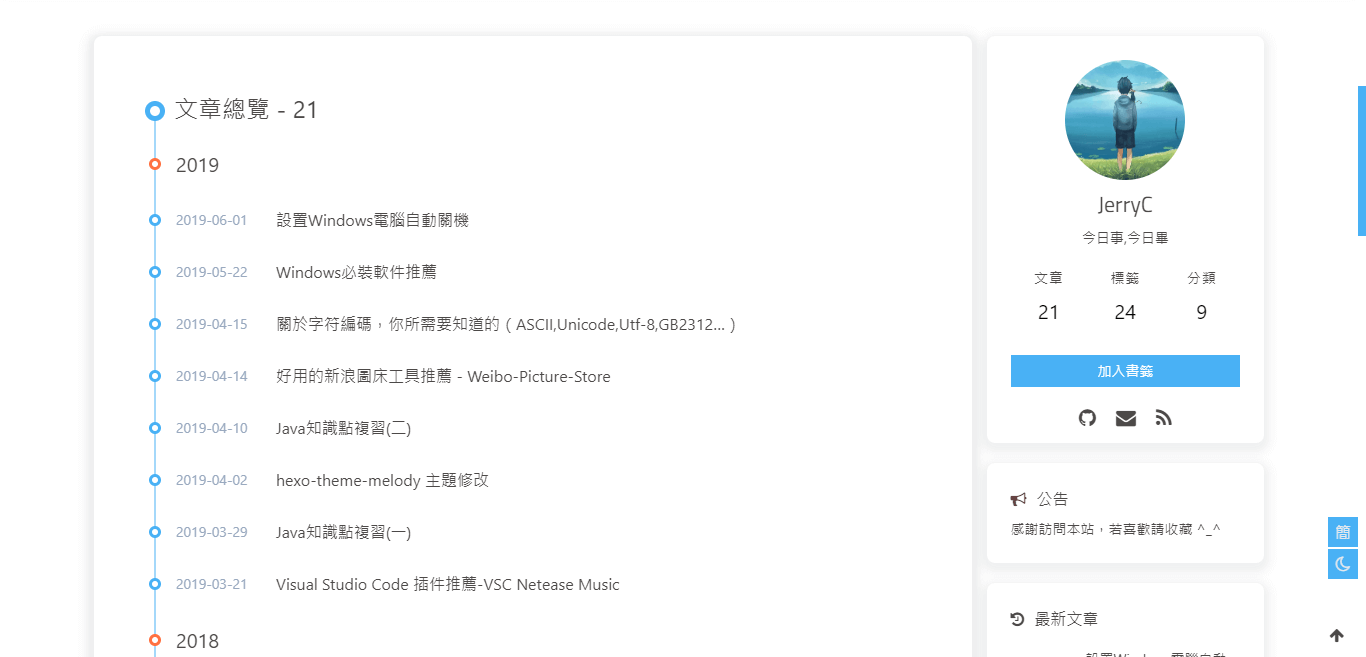
butterfly-docs-04-color_1
butterfly-docs-04-color_2

网站背景

默认显示白色,可设置图片或者颜色

修改 主题配置文件

1
2
3
4
# 图片格式 url(http://xxxxxx.com/xxx.jpg)
# 颜色(HEX值/RGB值/顔色单词/渐变色)
# 留空 不显示背景
background:

留意: 如果你的网站根目录不是’/‘,使用本地图片时,需加上你的根目录。
例如:网站是 https://yoursite.com/blog,引用一张img/xx.png图片,则设置background为 `url(/blog/img/xx.png)

background:’#49B202’
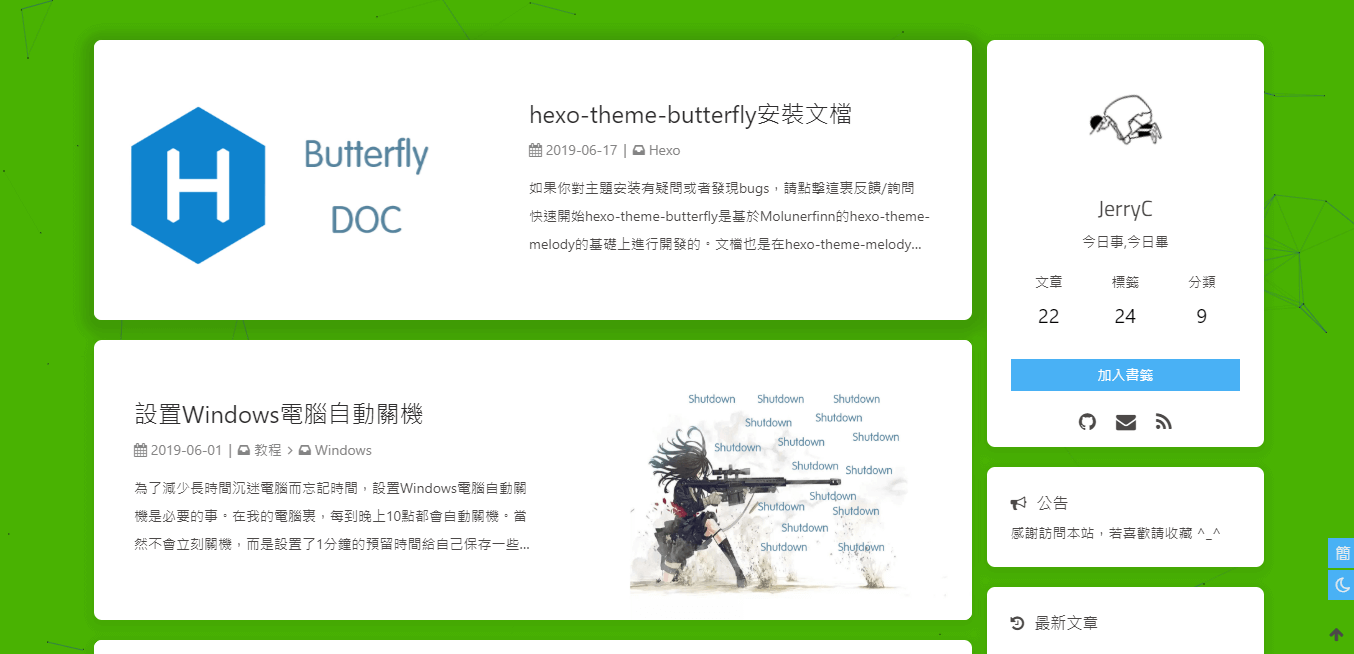
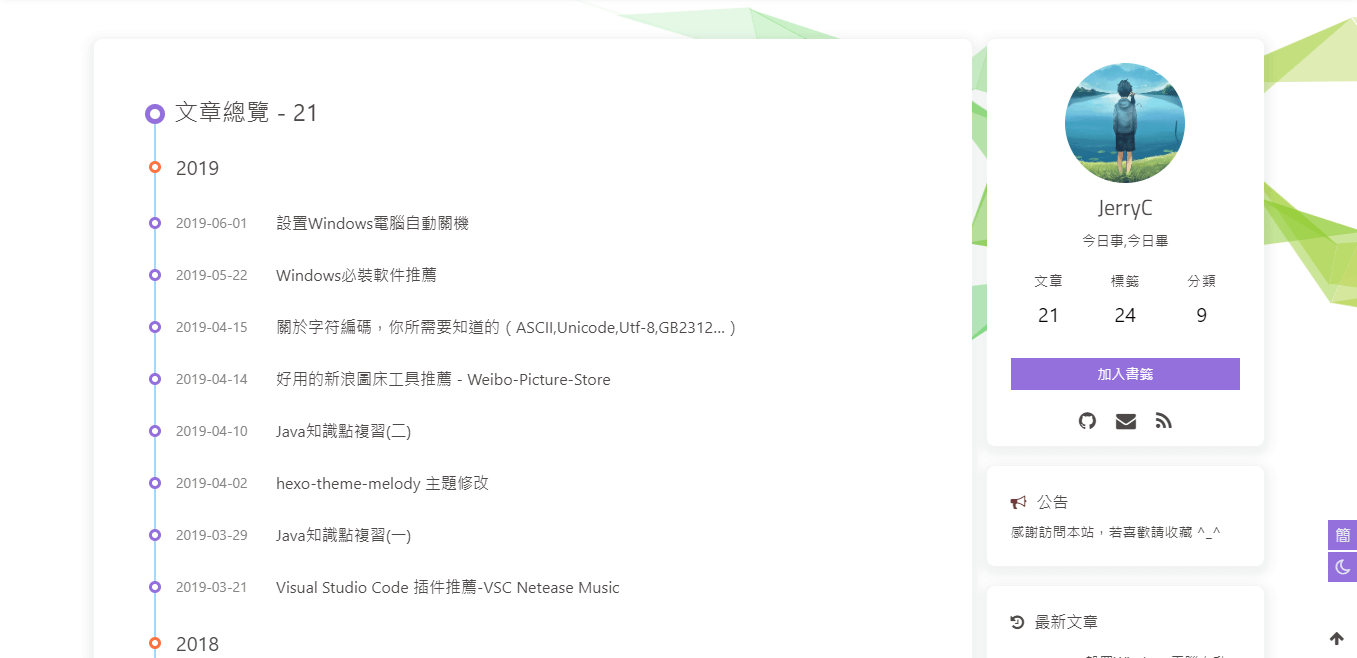
butterfly-docs-04-set-body-background-color

background: url(https://i.loli.net/2019/09/09/5oDRkWVKctx2b6A.png)
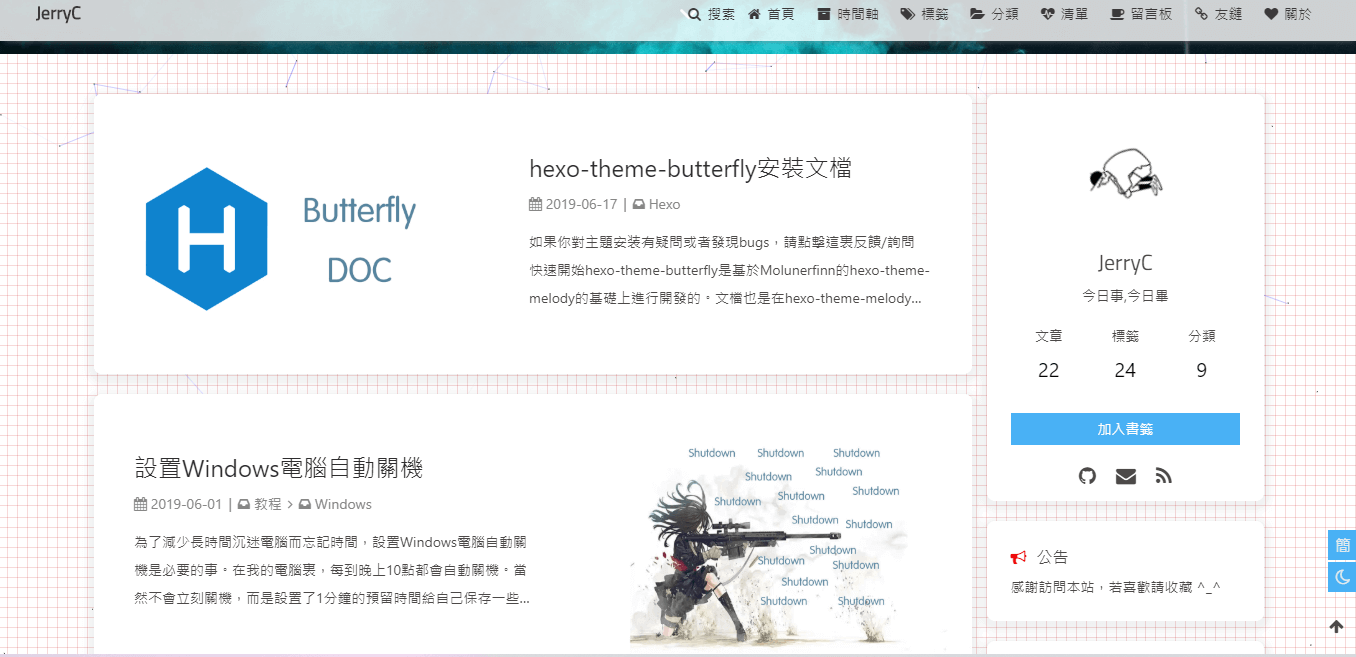
butterfly-docs-04-set-body-background-img

修改 主题配置文件

1
2
# footer是否显示图片背景(与top_img一致)
footer_bg: true
配置的值 效果
留空/false 显示默认的顔色
img链接 图片的链接,显示所配置的图片
顔色(
HEX值 - #0000FF
RGB值 - rgb(0,0,255)
顔色单词 - orange
渐变色 - linear-gradient( 135deg, #E2B0FF 10%, #9F44D3 100%)
对应的顔色
true 显示跟 top_img 一样

true

butterfly-docs-04-footer-img

打字效果

打字效果activate-power-mode

修改 主题配置文件

1
2
3
4
5
6
7
# Typewriter Effect (打字效果)
# https://github.com/disjukr/activate-power-mode
activate_power_mode:
enable: true
colorful: true # open particle animation (冒光特效)
shake: true # open shake (抖动特效)
mobile: false

butterfly-docs-04-type-animation

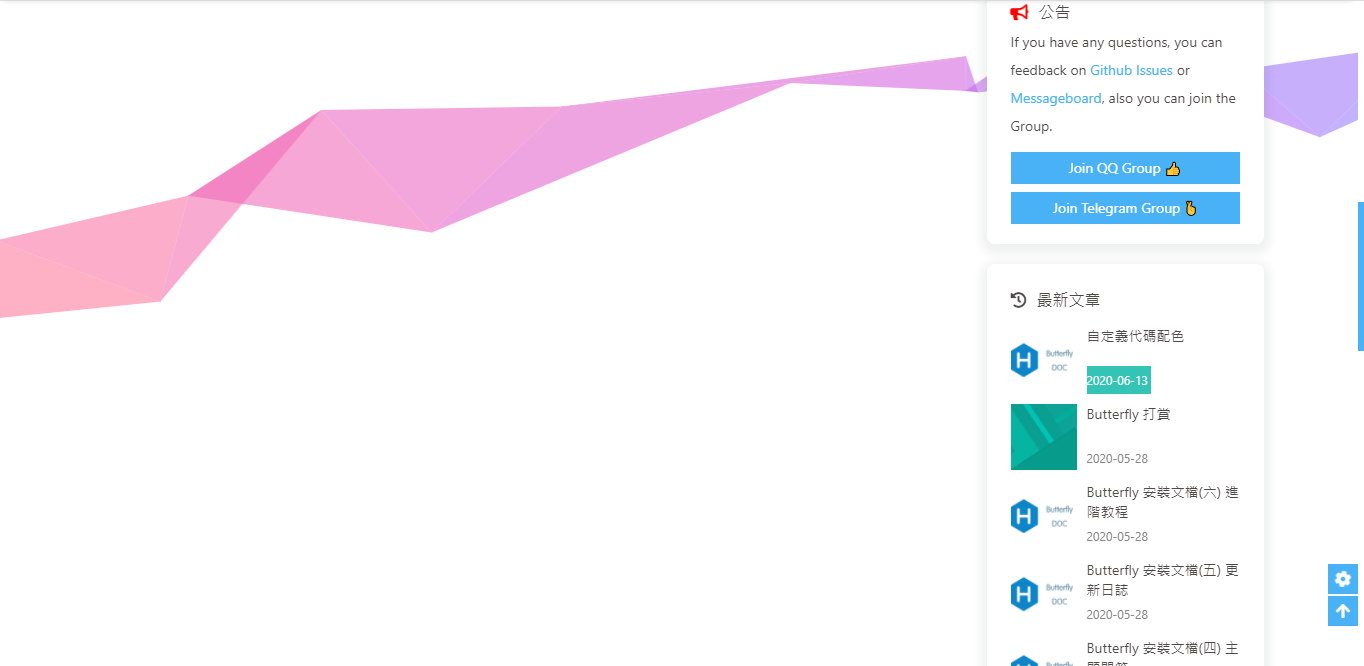
背景特效

好看的綵带背景,可设置每次刷新更换綵带,或者每次点击更换綵带
修改 主题配置文件

1
2
3
4
5
6
7
canvas_ribbon:
enable: false
size: 150
alpha: 0.6
zIndex: -1
click_to_change: false #设置是否每次点击都更换綵带
mobile: false # false 手机端不显示 true 手机端显示

相关配置可查看canvas_ribbon

butterfly-docs-04-canvas-ribbon

好看的綵带背景,会飘动
修改 主题配置文件

1
2
3
canvas_fluttering_ribbon:
enable: true
mobile: false # false 手机端不显示 true 手机端显示

butterfly-docs-04-canvas-ribbon-piao

修改 主题配置文件

1
2
3
4
5
6
7
canvas_nest:
enable: true
color: '0,0,255' #color of lines, default: '0,0,0'; RGB values: (R,G,B).(note: use ',' to separate.)
opacity: 0.7 # the opacity of line (0~1), default: 0.5.
zIndex: -1 # z-index property of the background, default: -1.
count: 99 # the number of lines, default: 99.
mobile: false # false 手机端不显示 true 手机端显示

butterfly-docs-04-canvas_nest

鼠标点击效果

zIndex建议只在-19999上选
-1 代表烟火效果在底部
9999 代表烟火效果在前面

修改 主题配置文件

1
2
3
4
fireworks:
enable: true
zIndex: 9999 # -1 or 9999
mobile: false

butterfly-docs-04-firewall

修改 主题配置文件

1
2
3
4
# 点击出现爱心
click_heart:
enable: true
mobile: false

butterfly-docs-04-click_love

修改 主题配置文件

1
2
3
4
5
6
7
8
9
10
# 点击出现文字,文字可自行修改
ClickShowText:
enable: false
text:
- I
- LOVE
- YOU
fontSize: 15px
random: false # 文字随机显示
mobile: false

butterfly-docs-04-click_word

页面美化

会改变ol、ul、h1-h5的样式

field配置生效的区域

  • post 只在文章页生效
  • site 在全站生效

修改 主题配置文件

1
2
3
4
5
6
# 美化页面显示
beautify:
enable: true
field: site # site/post
title-prefix-icon: '\f0c1'
title-prefix-icon-color: "#F47466"

title-prefix-icon填写的是fontawesome的icon的Unicode数。
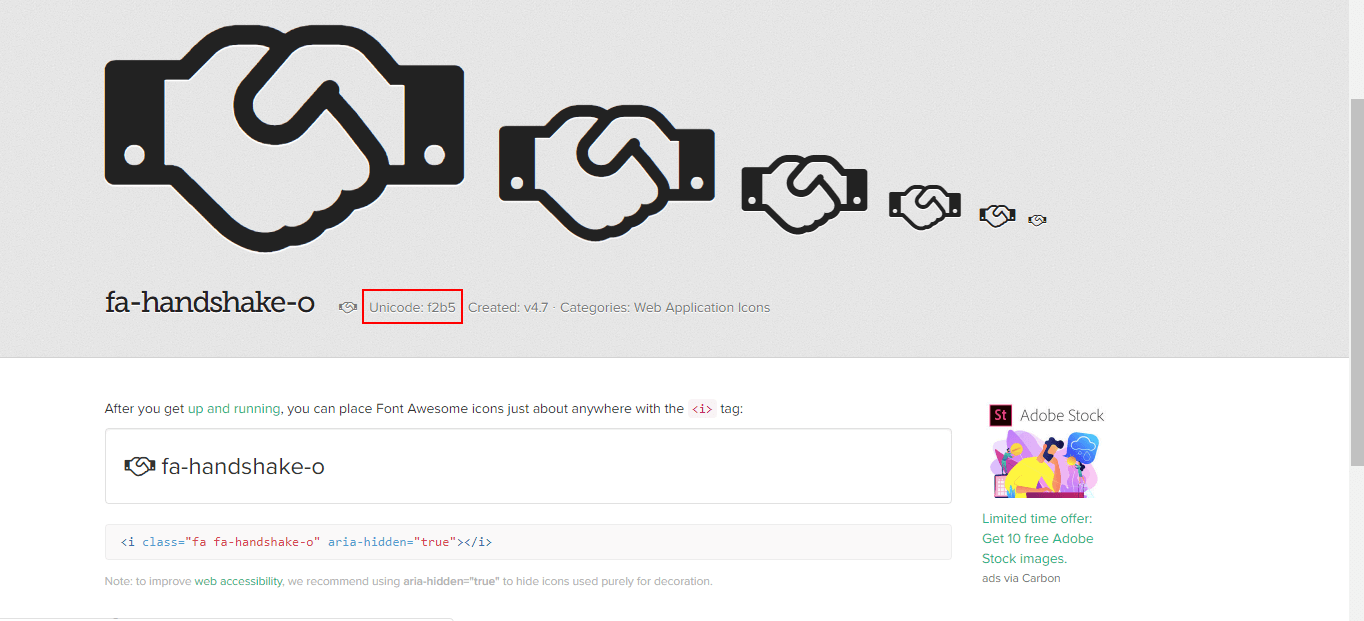
butterfly-docs-04-fontwesome-unicode

未开启美化

butterfly-docs-04-post-beautify

开启美化

butterfly-docs-04-post-beautif

自定义字体和字体大小

全局字体

可自行设置字体的font-family
如不需要配置,请留空

修改 主题配置文件

1
2
3
4
5
6
7
# Global font settings
# Don't modify the following settings unless you know how they work (非必要不要修改)
font:
global-font-size:
code-font-size:
font-family: -apple-system, BlinkMacSystemFont, "Segoe UI", "Helvetica Neue", Lato, Roboto, "PingFang SC", "Microsoft JhengHei", "Microsoft YaHei", sans-serif
code-font-family: consolas, Menlo, "PingFang SC", "Microsoft JhengHei", "Microsoft YaHei", sans-serif

Blog 标题字体

可自行设置字体的font-family
如不需要配置,请留空。
如不需要使用网络字体,只需要把font_link留空就行

修改 主题配置文件

1
2
3
4
5
# Font settings for the site title and site subtitle
# 左上角网站名字 主页居中网站名字
blog_title_font:
font_link: https://fonts.googleapis.com/css?family=Titillium+Web&display=swap
font-family: Titillium Web, 'PingFang SC', 'Hiragino Sans GB', 'Microsoft JhengHei', 'Microsoft YaHei', sans-serif

网站副标题

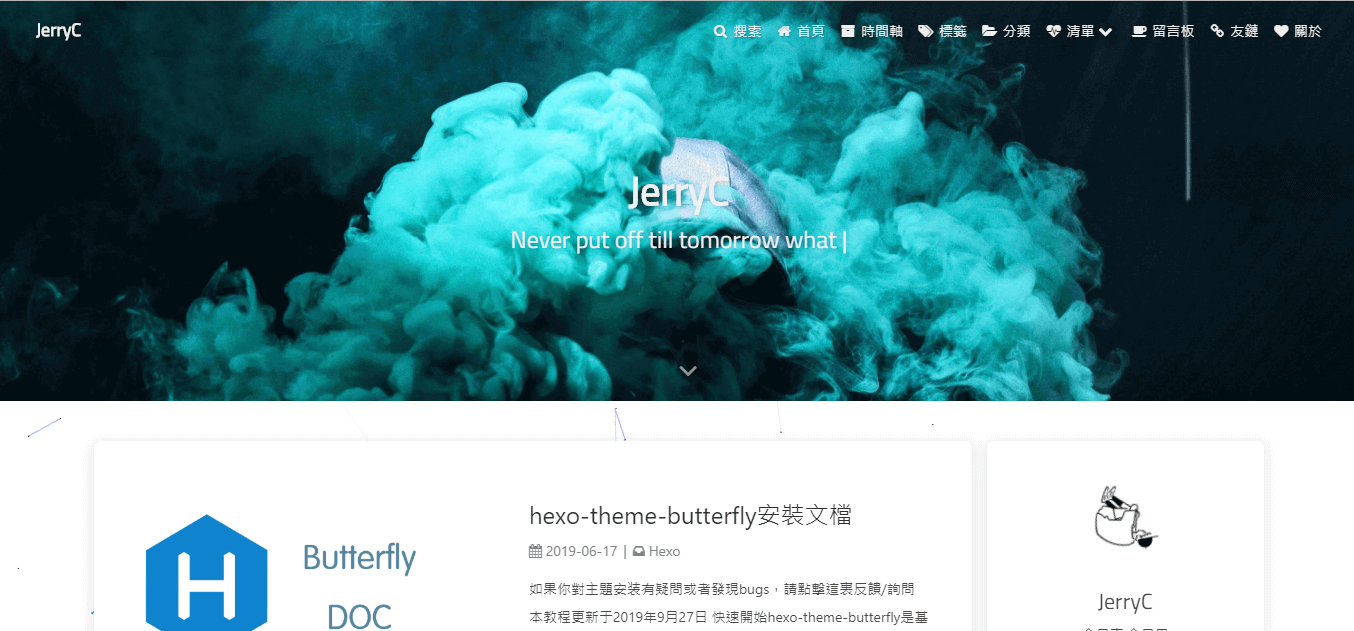
可设置主页中显示的网站副标题或者喜欢的座右铭。

修改 主题配置文件

1
2
3
4
5
6
7
8
9
10
11
12
13
14
15
16
17
18
19
20
21
# 主页subtitle
subtitle:
enable: false
# Typewriter Effect (打字效果)
effect: true
startDelay: 300 # time before typing starts in milliseconds
typeSpeed: 150 # type speed in milliseconds
backSpeed: 50 # backspacing speed in milliseconds
# loop (循环打字)
loop: true
# source 调用第三方服务
# source: false 关闭调用
# source: 1 调用一言网的一句话(简体) https://hitokoto.cn/
# source: 2 调用一句网(简体) http://yijuzhan.com/
# source: 3 调用今日诗词(简体) https://www.jinrishici.com/
# subtitle 会先显示 source , 再显示 sub 的内容
source: false
# 如果关闭打字效果,subtitle 只会显示 sub 的第一行文字
sub:
- 今日事&#44;今日毕
- Never put off till tomorrow what you can do today

butterfly-docs-04-index-subtitle

主页top_img显示大小

适用于 版本号 >= V1.2.0

默认的显示为全屏。site-info的区域会居中显示

1
2
3
4
5
# 主页设置
# 默认top_img全屏,site_info在中间
# 使用默认, 都无需填写(建议默认)
index_site_info_top: # 主页标题距离顶部距离 例如 300px/300em/300rem/10%
index_top_img_height: #主页top_img高度 例如 300px/300em/300rem 不能使用百分比

注意:index_top_img_height的值不能使用百分比。
2个都不填的话,会使用默认值

举例,当

1
index_top_img_height: 400px

效果

butterfly-docs-04-index-top-img-setting

页面加载动画preloader

当进入网页时,因为加载速度的问题,可能会导致top_img图片出现断层显示,或者网页加载不全而出现等待时间,开启preloader后,会显示加载动画,等页面加载完,加载动画会消失。

配置butterly.yml

1
2
# 加载动画 Loading Animation
preloader: true

butterfly-docs-04-preloader

PWA

要为Butterfly配上 PWA 特性, 你需要如下几个步骤:

  1. 打开 hexo 工作目录

  2. npm install hexo-offline --save 或者 yarn add hexo-offline

  3. 在根目录创建 hexo-offline.config.cjs 文件,并增加以下内容。

1
2
3
4
5
6
7
8
9
10
11
12
13
14
15
16
17
// offline config passed to workbox-build.
module.exports = {
globPatterns: ['**/*.{js,html,css,png,jpg,gif,svg,webp,eot,ttf,woff,woff2}'],
// 静态文件合集,如果你的站点使用了例如 webp 格式的文件,请将文件类型添加进去。
globDirectory: 'public',
swDest: 'public/service-worker.js',
maximumFileSizeToCacheInBytes: 10485760, // 缓存的最大文件大小,以字节为单位。
skipWaiting: true,
clientsClaim: true,
runtimeCaching: [ // 如果你需要加载 CDN 资源,请配置该选项,如果没有,可以不配置。
// CDNs - should be CacheFirst, since they should be used specific versions so should not change
{
urlPattern: /^https:\/\/cdn\.example\.com\/.*/, // 可替换成你的 URL
handler: 'CacheFirst'
}
]
}

更多内容请查看 hexo-offline的官方文档

  1. 主题配置文件中开启 pwa 选项。
1
2
3
4
5
6
7
pwa:
enable: true
manifest: /img/pwa/manifest.json
apple_touch_icon: /img/pwa/apple-touch-icon.png
favicon_32_32: /img/pwa/32.png
favicon_16_16: /img/pwa/16.png
mask_icon: /img/pwa/safari-pinned-tab.svg
  1. 在创建source/目录中创建manifest.json文件。
1
2
3
4
5
6
7
8
9
10
11
12
13
14
15
16
17
18
19
20
21
22
23
24
25
26
27
28
29
30
31
32
33
34
35
36
37
38
39
40
41
42
43
44
45
46
47
{
"name": "string",
"short_name": "Junzhou",
"theme_color": "#49b1f5",
"background_color": "#49b1f5",
"display": "standalone",
"scope": "/",
"start_url": "/",
"icons": [
{
"src": "images/pwaicons/36.png",
"sizes": "36x36",
"type": "image/png"
},
{
"src": "images/pwaicons/48.png",
"sizes": "48x48",
"type": "image/png"
},
{
"src": "images/pwaicons/72.png",
"sizes": "72x72",
"type": "image/png"
},
{
"src": "images/pwaicons/96.png",
"sizes": "96x96",
"type": "image/png"
},
{
"src": "images/pwaicons/144.png",
"sizes": "144x144",
"type": "image/png"
},
{
"src": "images/pwaicons/192.png",
"sizes": "192x192",
"type": "image/png"
},
{
"src": "images/pwaicons/512.png",
"sizes": "512x512",
"type": "image/png"
}
],
"splash_pages": null
}

你也可以通过 Web App Manifest快速创建manifest.json。(Web App Manifest 要求至少包含一个 512*512 像素的图标)

  1. 可以通过Chrome插件Lighthouse检查 PWA 配置是否生效以及配置是否正确。

    • 打开博客页面
    • 启动Lighthouse插件 (Lighthouse插件要求至少包含一个 512*512 像素的图标)

关于 PWA(渐进式增强 Web 应用)的更多内容请参閲 Google Tools for Web Developers

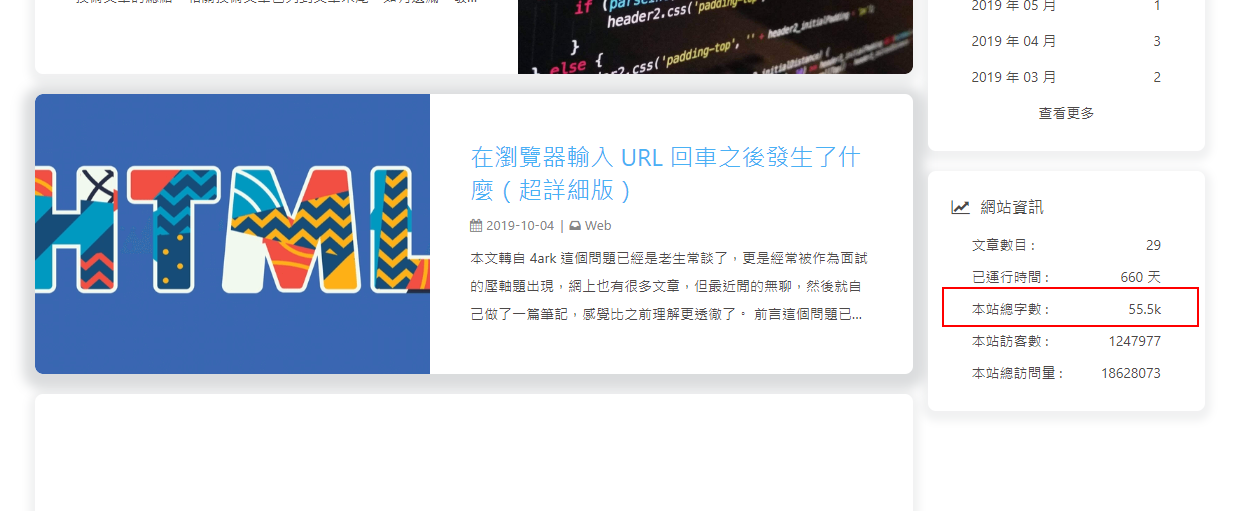
字数统计

要为Butterfly配上字数统计特性, 你需要如下几个步骤:

  1. 打开 hexo 工作目录

  2. npm install hexo-wordcount --save or yarn add hexo-wordcount

  3. 修改 主题配置文件:

1
2
3
4
5
wordcount:
enable: true
post_wordcount: true
min2read: true
total_wordcount: true

butterfly-docs-04-word-count
butterfly-docs-04-wordcount-totalcount

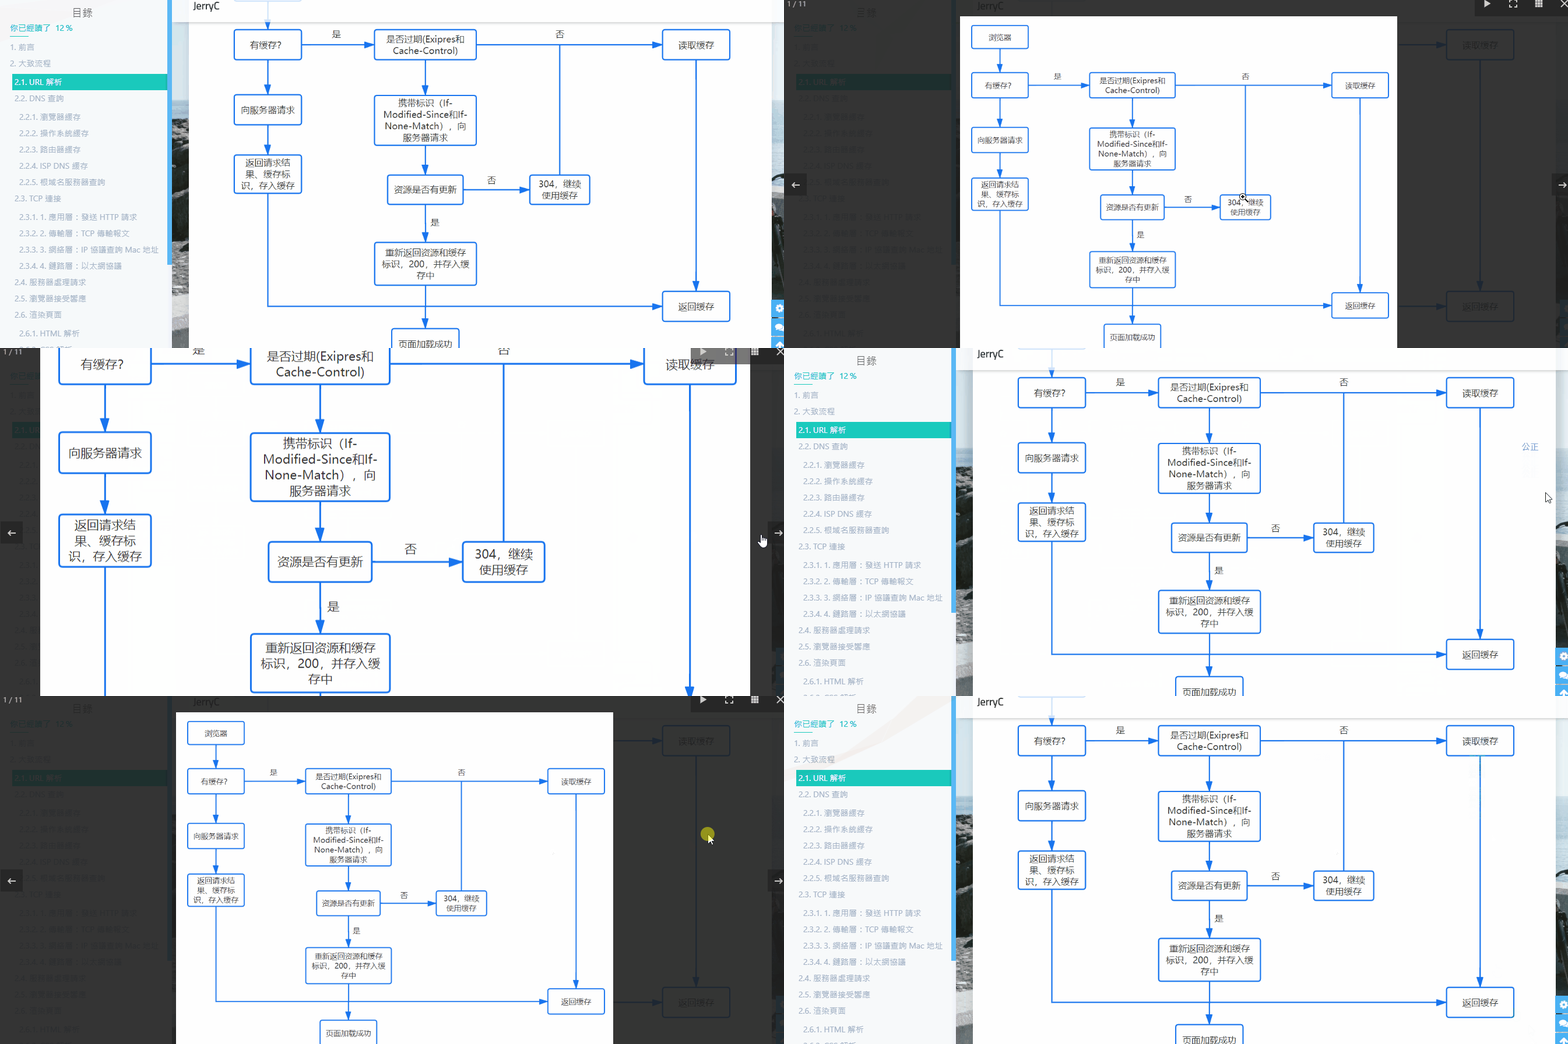
图片大图查看模式

只能开启一个

如果你并不想为某张图片添加大图查看模式,你可以使用 html 格式引用图片,併为图片添加 no-lightbox class 名。

修改 主题配置文件

1
2
# fancybox http://fancyapps.com/fancybox/3/
fancybox: true

butterfly-docs-04-fancybox

修改 主题配置文件

1
medium_zoom: true

butterfly-docs-04-medium_zoom

Snackbar 弹窗

Snackbar 弹窗,根据自己爱好开启

修改 主题配置文件

1
2
3
4
5
6
7
8
9
# Snackbar 弹窗
# https://github.com/polonel/SnackBar
# position 弹窗位置
# 可选 top-left / top-center / top-right / bottom-left / bottom-center / bottom-right
snackbar:
enable: true
position: bottom-left
bg_light: '#49b1f5' #light mode时弹窗背景
bg_dark: '#2d3035' #dark mode时弹窗背景

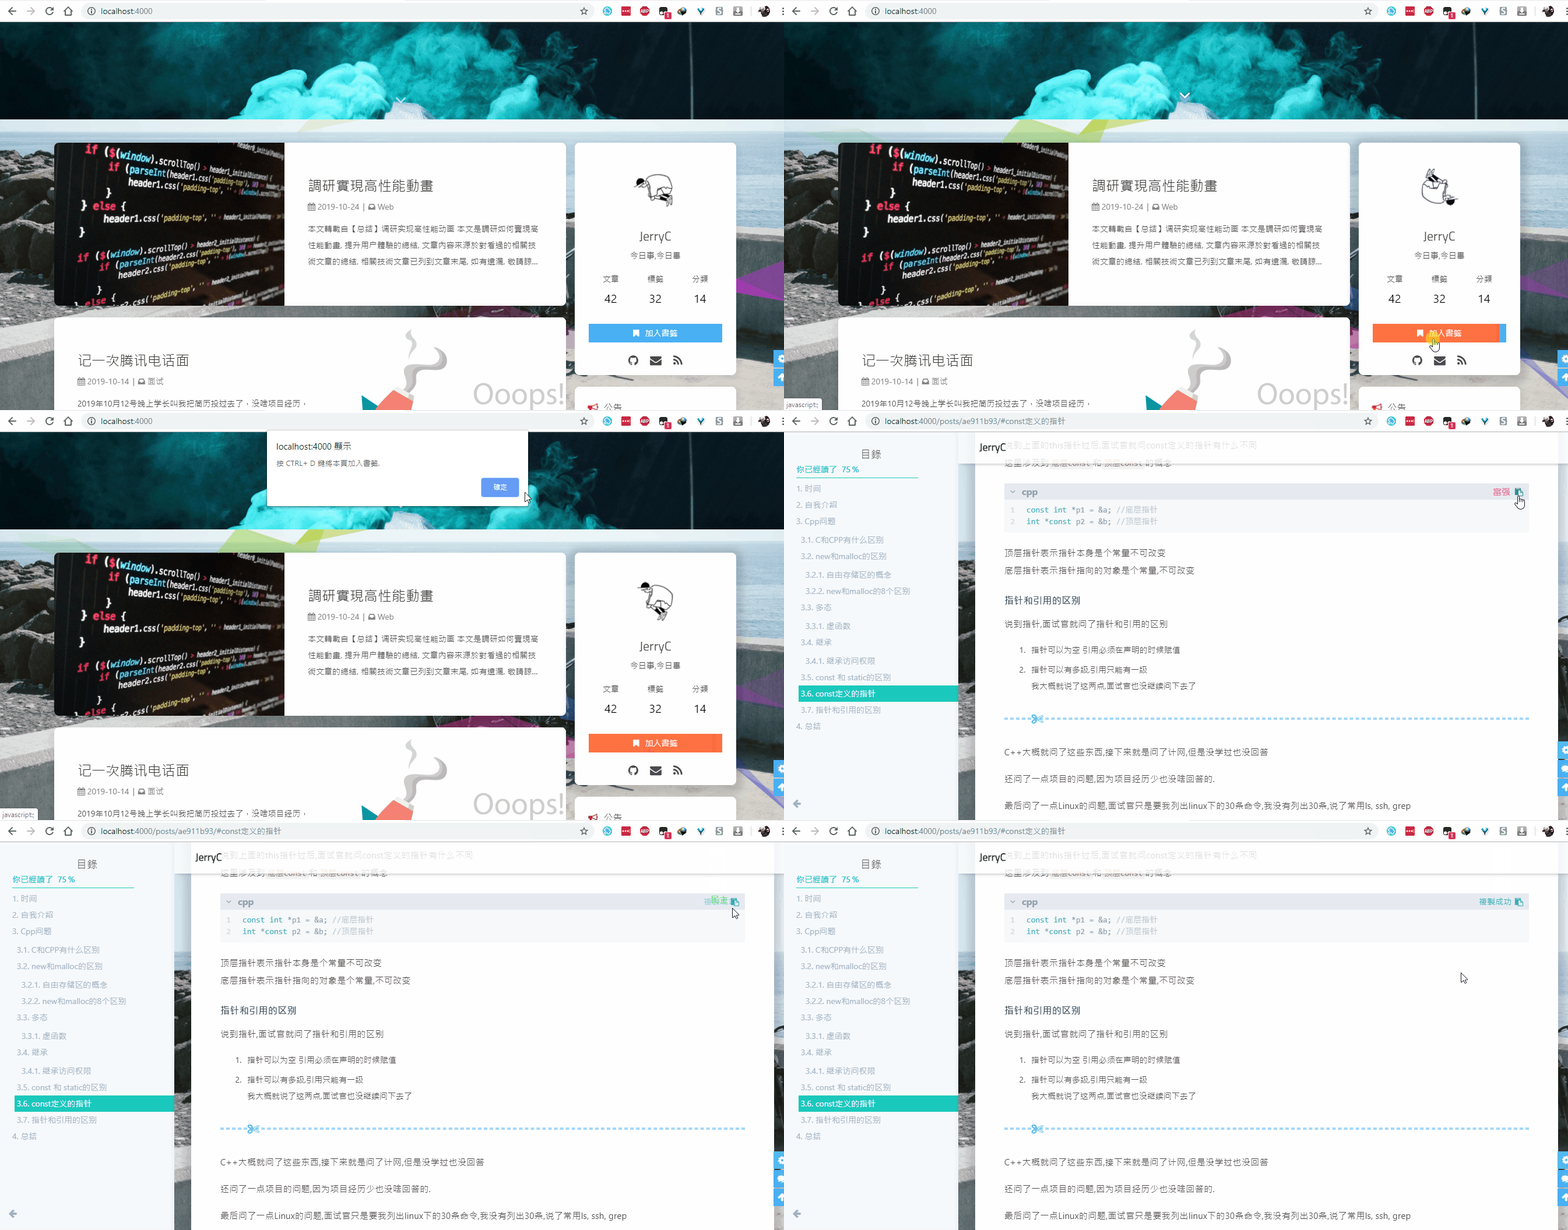
未开启Snackbar

butterfly-docs-04-snackbar_false

开启Snackbar

butterfly-docs-04-snackbar_true

其它配置

CSS 前缀

有些 CSS 并不是所有浏览器都支持,需要增加对应的前缀才会生效。

开启 css_prefix 后,会自动为一些 CSS 增加前缀。(会增加 20%的体积)

修改配置文件

1
2
# Add the vendor prefixes to ensure compatibility
css_prefix: true

Open Graph

head 里增加一些 meta 资料,例如缩略图、标题、时间等等。当你分享网页到一些平台时,平台会读取 Open Graph 的内容,展示缩略图,标题等等信息。

修改配置文件

1
2
3
# Open graph meta tags
# https://developers.facebook.com/docs/sharing/webmasters/
Open_Graph_meta: true

Instantpage

当鼠标悬停到链接上超过 65 毫秒时,Instantpage 会对该链接进行预加载,可以提升访问速度。

修改配置文件

1
2
3
# https://instant.page/
# prefetch (预加载)
instantpage: true

Pangu

如果你跟我一样,每次看到网页上的中文字和英文、数字、符号挤在一块,就会坐立难安,忍不住想在它们之间加个空格。这个外挂正是你在网路世界走跳所需要的东西,它会自动替你在网页中所有的中文字和半形的英文、数字、符号之间插入空白。

修改配置文件

1
2
3
4
5
# https://github.com/vinta/pangu.js
# Insert a space between Chinese character and English character (中英文之间添加空格)
pangu:
enable: false
field: post # site/post

field只支持两个参数,post(只在文章页生效)和site(全站生效)

Pjax

当用户点击链接,通过ajax更新页面需要变化的部分,然后使用HTML5的pushState修改浏览器的URL地址。

这样可以不用重複加载相同的资源(css/js), 从而提升网页的加载速度。

1
2
3
4
5
6
7
8
# Pjax [Beta]
# It may contain bugs and unstable, give feedback when you find the bugs.
# https://github.com/MoOx/pjax
pjax:
enable: true
exclude:
- /music/
- /no-pjax/

对于一些第三方插件,有些并不支持 pjax 。
你可以把网页加入到 exclude 里,这个网页会被 pjax 排除在外。
点击该网页会重新加载网站

使用pjax后,一些自己DIY的js可能会无效,跳转页面时需要重新调用,请参考Pjax文档
使用pjax后,一些个别页面加载的js/css,将会改为所有页面都加载

Butterfly的Pjax目前仍有一些问题,请留意

  • 使用谷歌广告可能会报错(例如自动广告)

如果你在使用中发现问题,欢迎反馈Bugs

Inject

2.3.0以上支持

如想添加额外的js/css/meta等等东西,可以在Inject里添加,支持添加到head(</body>标籤之前)和bottom(</html>标籤之前)。

请注意:以标准的html格式添加内容

例如

1
2
3
4
5
inject:
head:
- <link rel="stylesheet" href="/self.css">
bottom:
- <script src="xxxx"></script>

留意: 如果你的网站根目录不是’/‘,使用本地图片时,需加上你的根目录。
例如:网站是 https://yoursite.com/blog,引用css/xx.css,则设置为<link rel="stylesheet" href="/blog/css/xx.css">

CDN

配置文件中最后一部分CDN,里面是主题所引用到的文件,可自行配置CDN。(非必要请勿修改,配置后请确认链接是否能访问)

1
2
3
4
5
6
7
8
9
10
11
12
13
14
15
16
17
18
19
20
21
22
23
24
25
26
27
28
29
30
31
32
33
34
35
36
37
38
39
40
41
42
43
44
45
46
47
48
49
50
51
52
53
54
55
56
57
58
59
60
61
62
63
64
65
66
67
68
CDN:
# The CDN provider of internal scripts (主题内部 js 的 cdn 配置)
# option: local/jsdelivr/unpkg/cdnjs/custom
# Dev version can only choose. ( dev版的主题只能设置为 local )
internal_provider: local

# The CDN provider of third party scripts (第三方 js 的 cdn 配置)
# option: local/jsdelivr/unpkg/cdnjs/custom
# when set it to local, you need to install hexo-butterfly-extjs
third_party_provider: jsdelivr

# Add version number to CDN, true or false
version: false

# Custom format
# For example: https://cdn.staticfile.org/${cdnjs_name}/${version}/${min_cdnjs_file}
custom_format:

option:
# main_css:
# main:
# utils:
# translate:
# local_search:
# algolia_js:
# algolia_search_v4:
# instantsearch_v4:
# pjax:
# gitalk:
# gitalk_css:
# blueimp_md5:
# valine:
# disqusjs:
# disqusjs_css:
# twikoo:
# waline_js:
# waline_css:
# sharejs:
# sharejs_css:
# mathjax:
# katex:
# katex_copytex:
# mermaid:
# canvas_ribbon:
# canvas_fluttering_ribbon:
# canvas_nest:
# lazyload:
# instantpage:
# typed:
# pangu:
# fancybox_css_v4:
# fancybox_v4:
# medium_zoom:
# snackbar_css:
# snackbar:
# activate_power_mode:
# fireworks:
# click_heart:
# ClickShowText:
# fontawesomeV6:
# flickr_justified_gallery_js:
# flickr_justified_gallery_css:
# aplayer_css:
# aplayer_js:
# meting_js:
# prismjs_js:
# prismjs_lineNumber_js:
# prismjs_autoloader:
参数 解释
internal_provider 主题内部文件
可选 local/jsdelivr/unpkg/cdnjs/custom
lcoal 为本地加载,custom 为自定义格式,需配置 custom_format
注意: 如果使用的是 Dev 版,只能设置为 local
third_party_provider 第三方文件
可选 local/jsdelivr/unpkg/cdnjs/custom
lcoal 为本地加载,custom 为自定义格式,需配置 custom_format
注意: 如果你选择 local 需要安装 hexo-butterfly-extjs插件
version true/false 为 cdn 加上指定版本号
custom_format 自定义格式
option 你可以在这里更换部分文件,会覆盖原有的配置

version

如需修改版本号,可修改主题目录的 ‘plugins.yml’ 中对应插件的 version

请确保你修改的版本号,你所使用的 cdn 有收录

custom_format

提供以下参数

参数 解释
name npm 上的包名
file npm 上的文件路径
min_file npm 上的文件路径(压缩过的文件)
cdnjs_name cdnjs 上的包名
cdnjs_file cdnjs 上的文件路径
min_cdnjs_file cdnjs 上的文件路径(压缩过的文件)
version 插件版本号

部分可用的第三方 CDN 列表

请确保你选择的 CDN 有收录主题使用的第三方插件

提供商 格式 备注
Staticfile(七牛云) https://cdn.staticfile.org/${cdnjs_name}/${version}/${min_cdnjs_file} 同步 cdnjs
BootCDN https://cdn.bootcdn.net/ajax/libs/${cdnjs_name}/${version}/${min_cdnjs_file} 同步 cdnjs
Baomitu(360) 最新版本: https://lib.baomitu.com/${cdnjs_name}/latest/${min_cdnjs_file}
指定版本: https://lib.baomitu.com/${cdnjs_name}/${version}/${min_cdnjs_file}
同步 cdnjs
Elemecdn 最新版本: https://npm.elemecdn.com/${name}@latest/${file}
指定版本: https://npm.elemecdn.com/${name}@${version}/${file}
同步 npm
❓ Butterfly 安装文档(六) 进阶教程